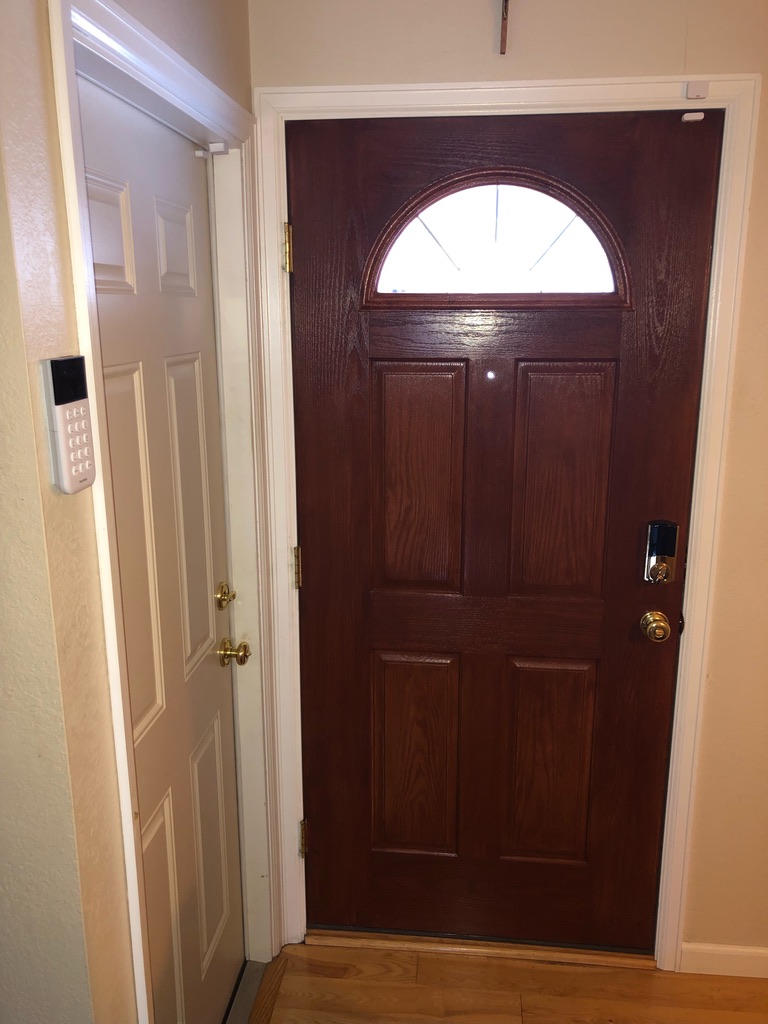
Interior and Exterior door maintenance are usually overlooked by many homeowners. Many people ask "How do I maintain my exterior doors" or "How do I maintain my interior doors." Here’s a list of the typical problems for exterior entry doors and interior doors, and some simple instructions to follow to fix these problems and to maintain the wood doors in your home. The following does not apply to steel doors, steel frames, fiberglass doors, vinyl or other composite material. These instructions assume you are working with wooden doors and frame assemblies and may not apply to sliding patio, storm doors, and screen doors as these are typically not made of a wooden material.
Unwanted Self-closing Door
One of the most annoying issues is a hinged door that won’t stay open. It slowly closes and you need a stop to keep it open. This is caused because the door is installed out of plumb. You could remove the door and frame and reinstall it but that is a lot of work and needs some special skill, tools, and knowledge of door installation. There is a simple fix that will stop the door from closing,…. most of the time.
Remove one of the hinge pins by driving it upward. Start with the top hinge. There should be a small hole in the bottom of the hinge to insert a small punch, awl, or a nail and use a hammer to drive the pin up enough to be able to grab the barrel of the pin with pliers. Complete removing the pin with the pliers; you may need to use a hammer to tap up on the pliers to finish removing the pin if it is tight.
Wipe the pin off with a rag. The solution is to put a slight bend in the pin so when it is inserted, it puts pressure on the hinge to create enough friction to stop it closing on its own. Take the rag, the pin, and hammer to a concrete surface. With the pin laying on the rag on concrete, it will only contact at the top and bottom of the pin leaving a small space. Tap on the middle of the barrel of the pin to put a slight bend in the pin. Using a hammer, reinsert the pin in the hinge and test the door. If it still closes on its own, you can repeat the procedure on the pin putting more of a bend in the pin. Or, remove another pin and do the same process of bending the pin. Depending on how out of plumb the door is, in some rare cases you need to bend all 3 pins to solve the problem. If bending all 3 pins does not solve the problem, the only solution is to remove the door and frame and reinstall it. If you do not feel comfortable removing or replacing the door, contact a Repair Professional for this service.
Squeaky Hinges
Over time the hinges on your interior or exterior doors may squeak when opening or closing. The solution is to add some lubrication to the hinge(s). Try to determine which hinge is squeaking either by the location of the sound, or by touching each hinge, you may feel a vibration at the culprit.
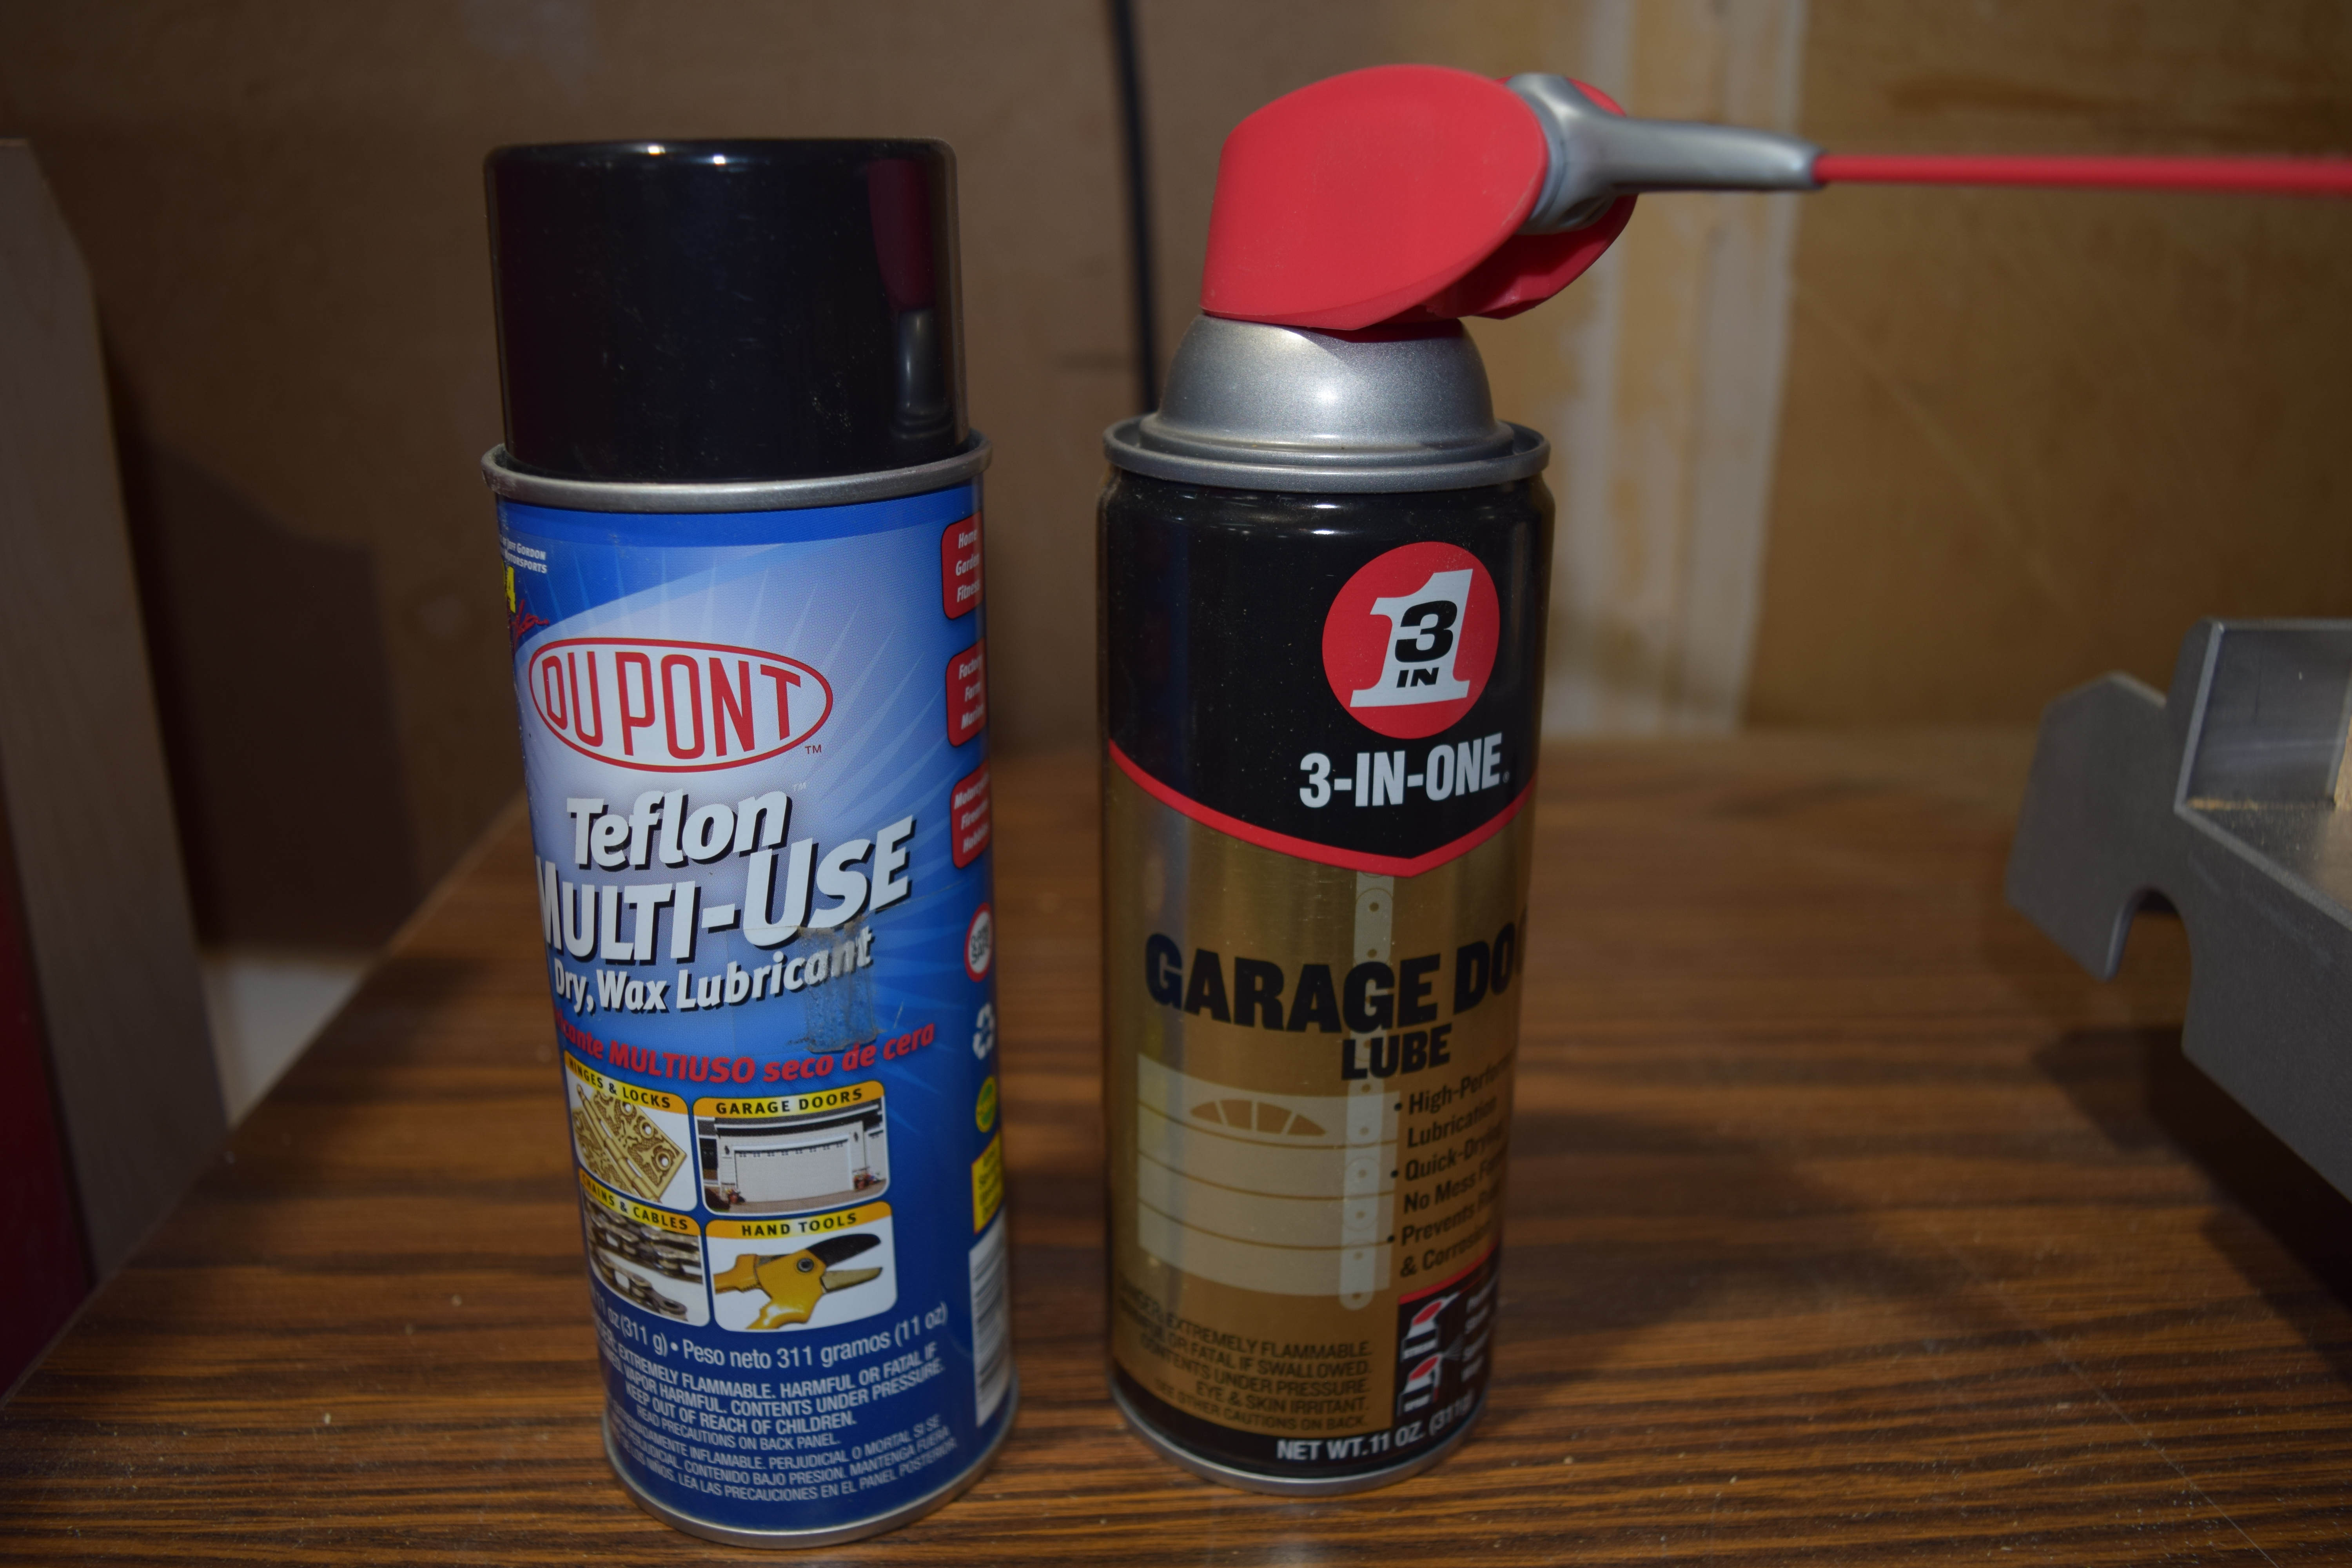
Remove the hinge pin and wipe it off with a rag. Use a dry spray silicone or Teflon lubricant. Some people will tell you to use oil or WD40. That is poor selection as any oil-based product will attract dust and dirt and the problem will reoccur sooner. One older solution was to use graphite as a lubricant. That will work, however, it is messy and difficult to get it only on the pin and inside the barrel holes of the hinge.
After removing the pin, in a protected area, spray the pin with the lubricant and reinsert it back in the hinge. If the squeak continues in the same hinge, drive the pin part way up, and spray the pin, allowing the lubricant to run down into the barrels and drive the pin down. When you spray the pin with it still in the hinge, be sure to protect the area around the door and walls. Repeat on the other hinges as needed.
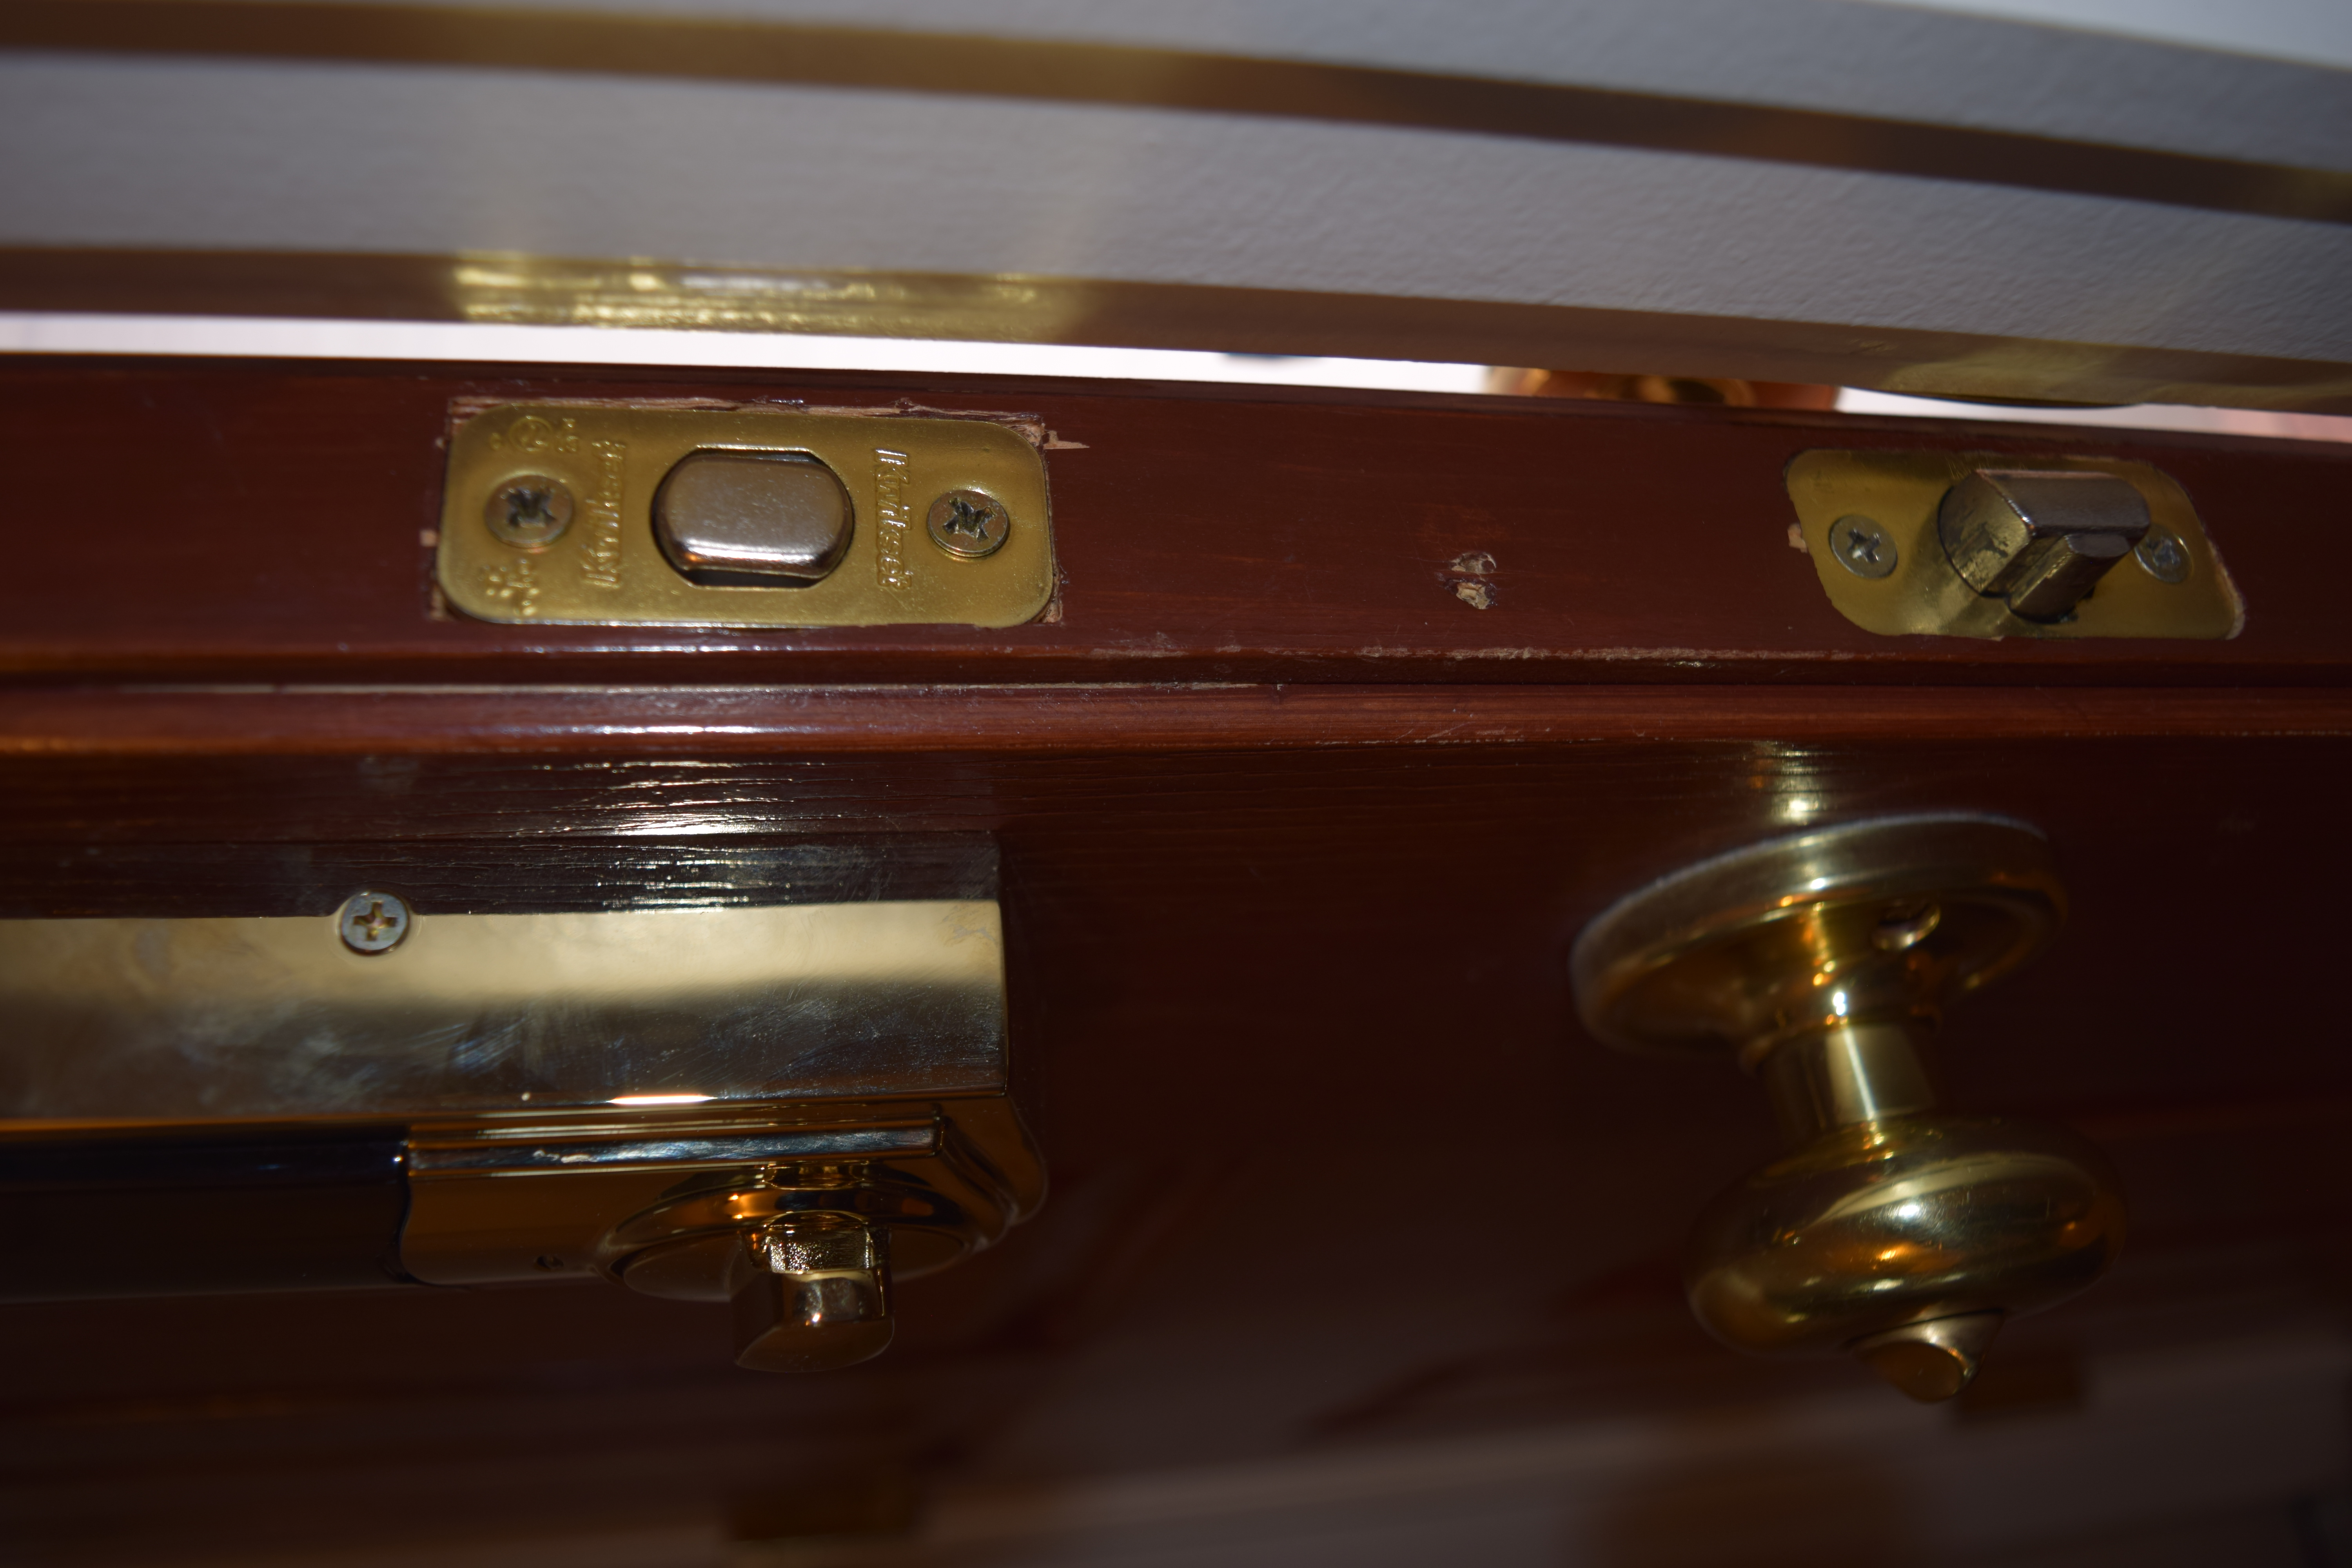
Bolt won’t Latch
Does the dead bolt lock or knob latch not engage in the strike plate hole or drags hard when turning the deadbolt or knob? This can be a seasonal problem from temperature and is common on exterior doors. Humidity changes inside can also cause similar effects on the interior doors. Whether interior or exterior the solution is the same. To identify the problem, close the door, and using a flash light, look in the gap between the door frame and the door at the latch/bolt to determine if it is striking the strike plate on the jamb high or low, or front to back (you have to push hard to close the door), and about how far off it is.
If it is only off a small amount, 1/16” or less, high or low, or front to back on the plate, use a steel file or rotary file tool (Dremel) and file the strike plate larger to let the latch or bolt fully engage in the plate. If it is a large amount, greater than 1/16” high or low or it is a front to back issue then the strike plate on the jamb needs to be removed and adjusted on the door frame.
To adjust the strike plate for the knob or deadbolt, the procedure is the same. Again, this procedure assumes you have a wooden door frame. (Do not use this for metal frames.) Visually determine how much front to back or up/down the plate needs moved. Ideally, the strike plate should be centered on the latch or bolt. Remove the screws from the strike plate, then lay the strike on the frame where you want it located and mark the area of the wood you need to remove. You will be removing some of the wood on the frame to relocate the strike. Using a hammer and a wood chisel, tap the chisel on the line in the wood to the depth of the thickness of the strike. With the hammer and chisel, carefully, remove the wood inside the area where you want the new location to be. Be careful removing this wood so you do not break or splinter the wood outside the line(s) you drew.
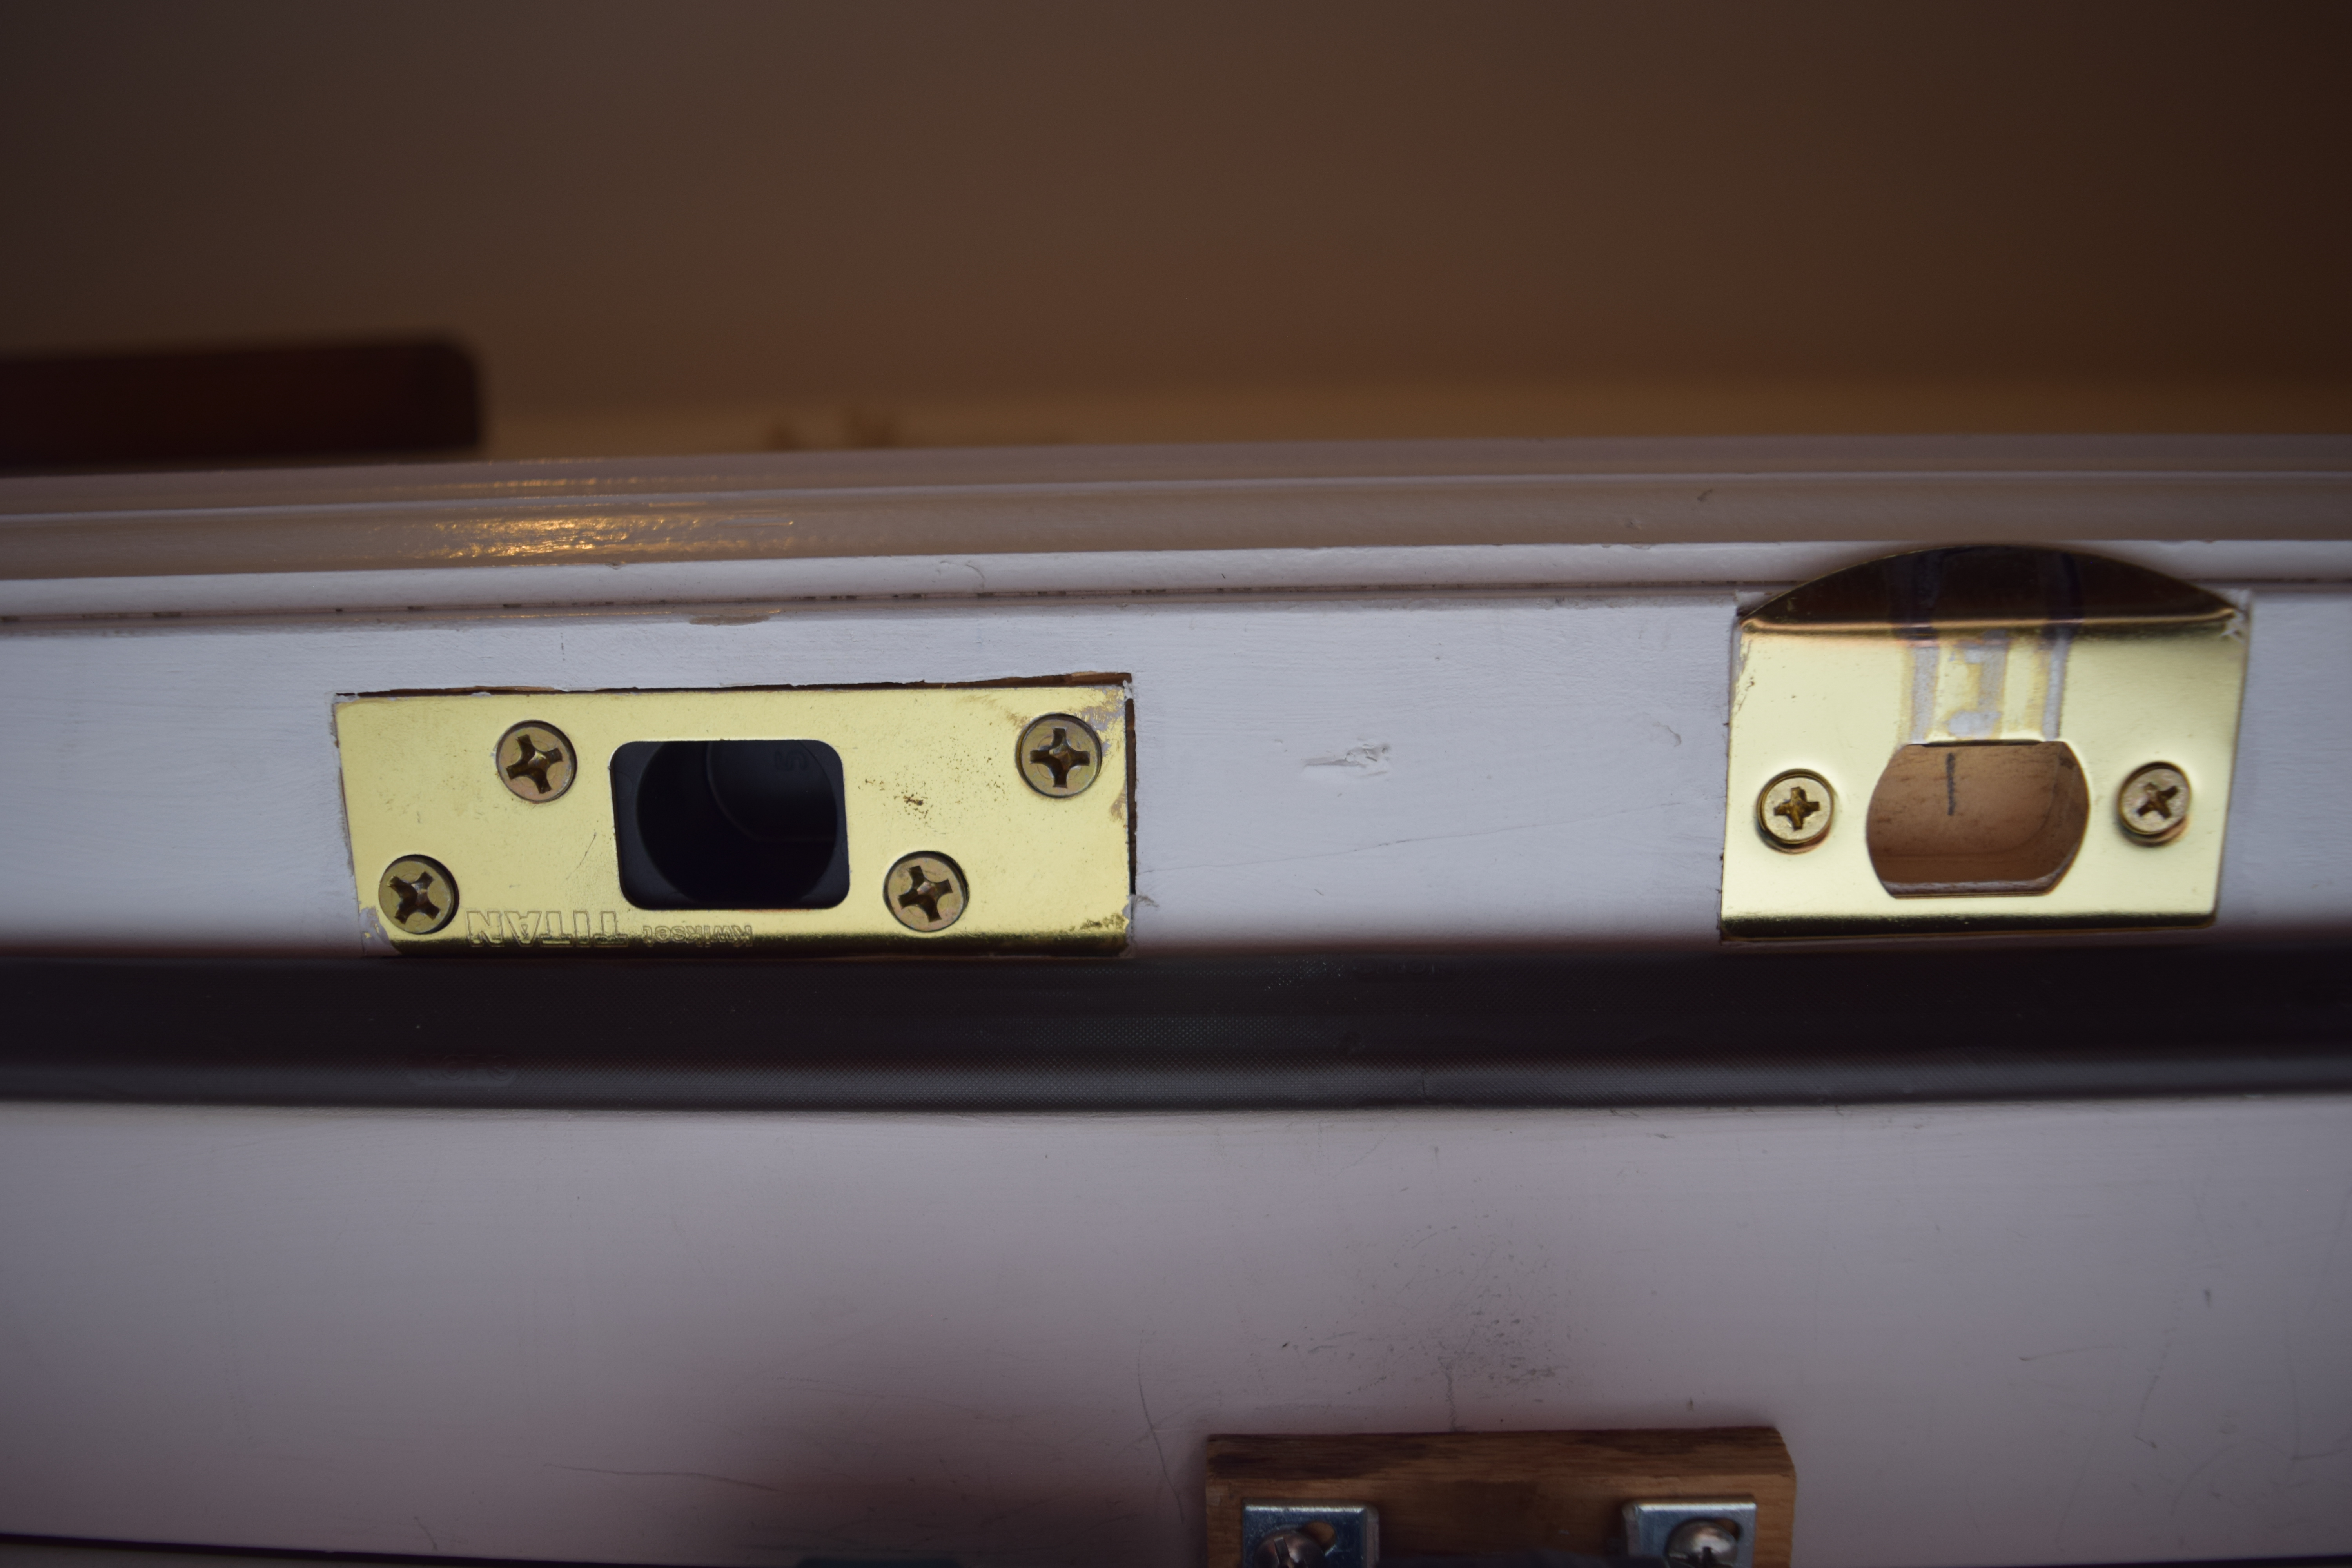
After you have removed the wood, you will typically need to plug the old screw holes depending on how far you moved the strike plate. Use a scrap of wood, whittle (shape) a piece of wood to create a small plug/pin to drive in the old screw holes. You can also purchase a small dowel slightly larger than the holes at the hardware or home improvement store to make a pin. Drive the newly created wood pin in each of the old screw holes and cut it off. Lay the strike in the new area and mark the screw holes. Using a drill and wood bit, drill pilot holes correctly sized for the screws and install the plate. Test the door. Hopefully you moved the strike enough and in the correct direction. If not, repeat the procedure. If the latch or bolt hole drilled in the wood jamb is showing where the bolt or latch inserts behind the plate, enlarge the hole in the jamb with a drill bit or chisel.
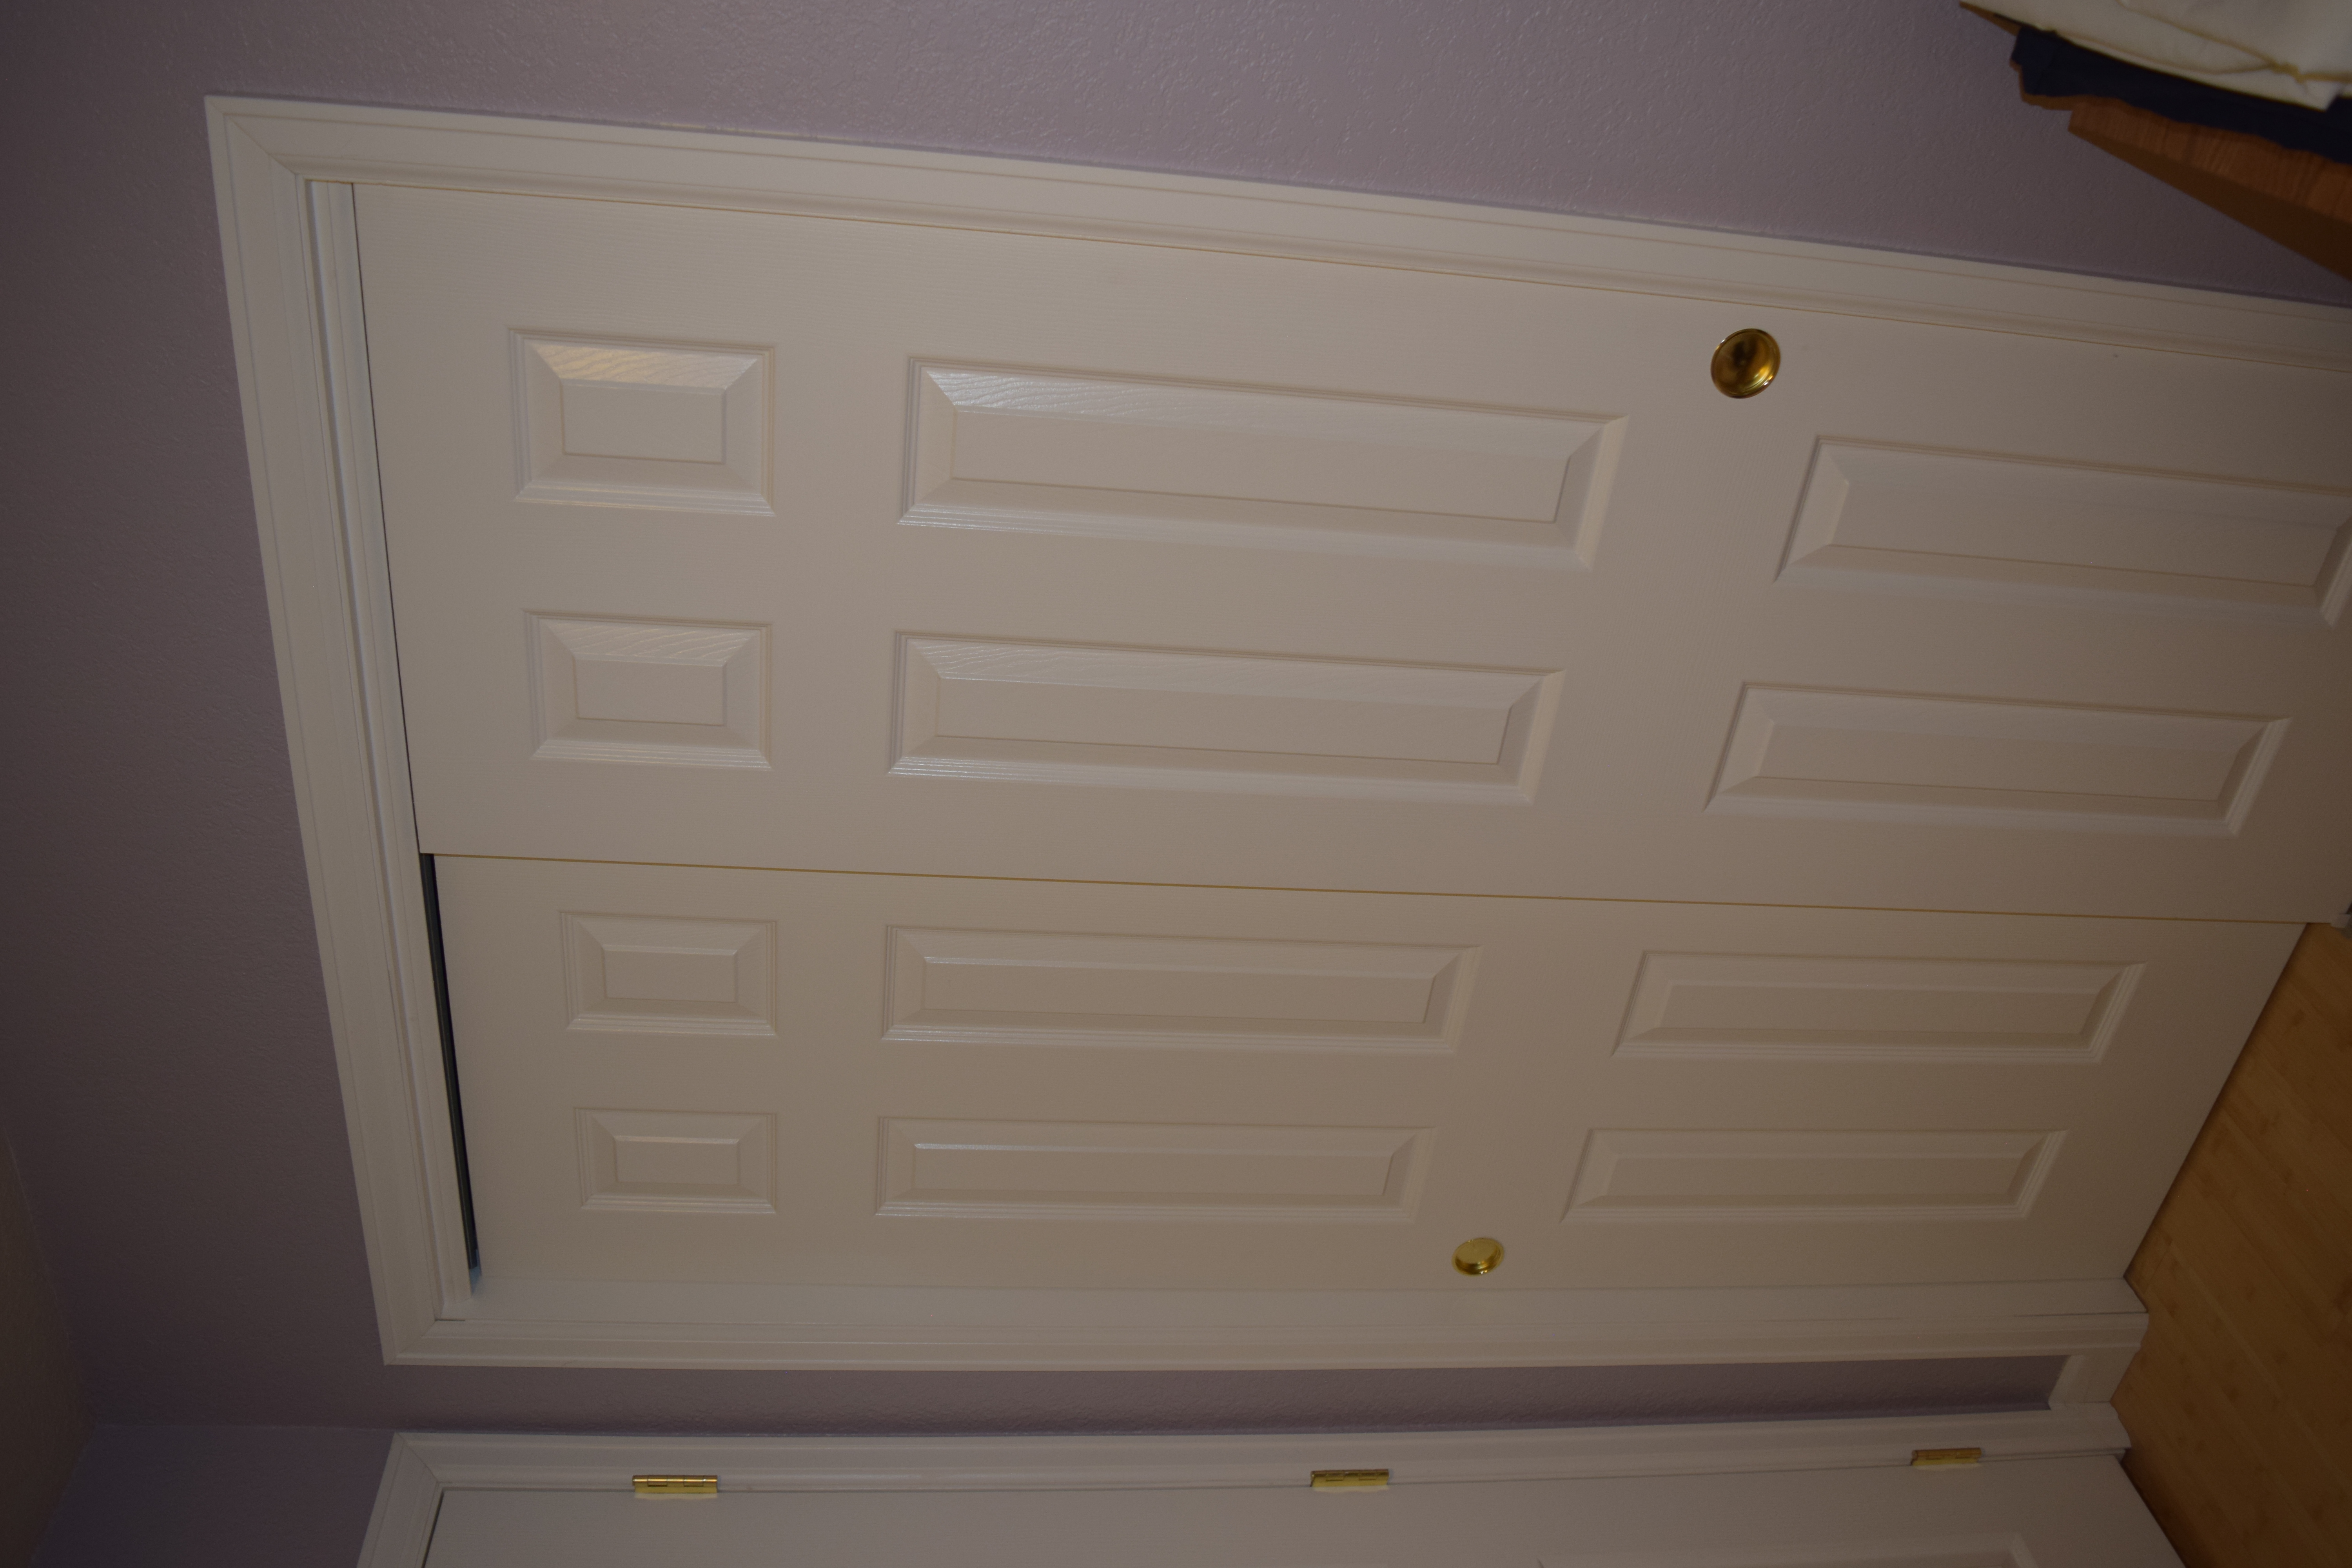
Loose Door Knob or Deadbolt Assembly.
How many times have you been at someone’s home or a hotel and find door knobs loose? This is so easy to fix. Knobs are a two-piece assembly and usually have two screws on one side. You need a screwdriver, (typically a Phillips) to tighten the screws. Some screws may be behind a cover plate that you need to remove.
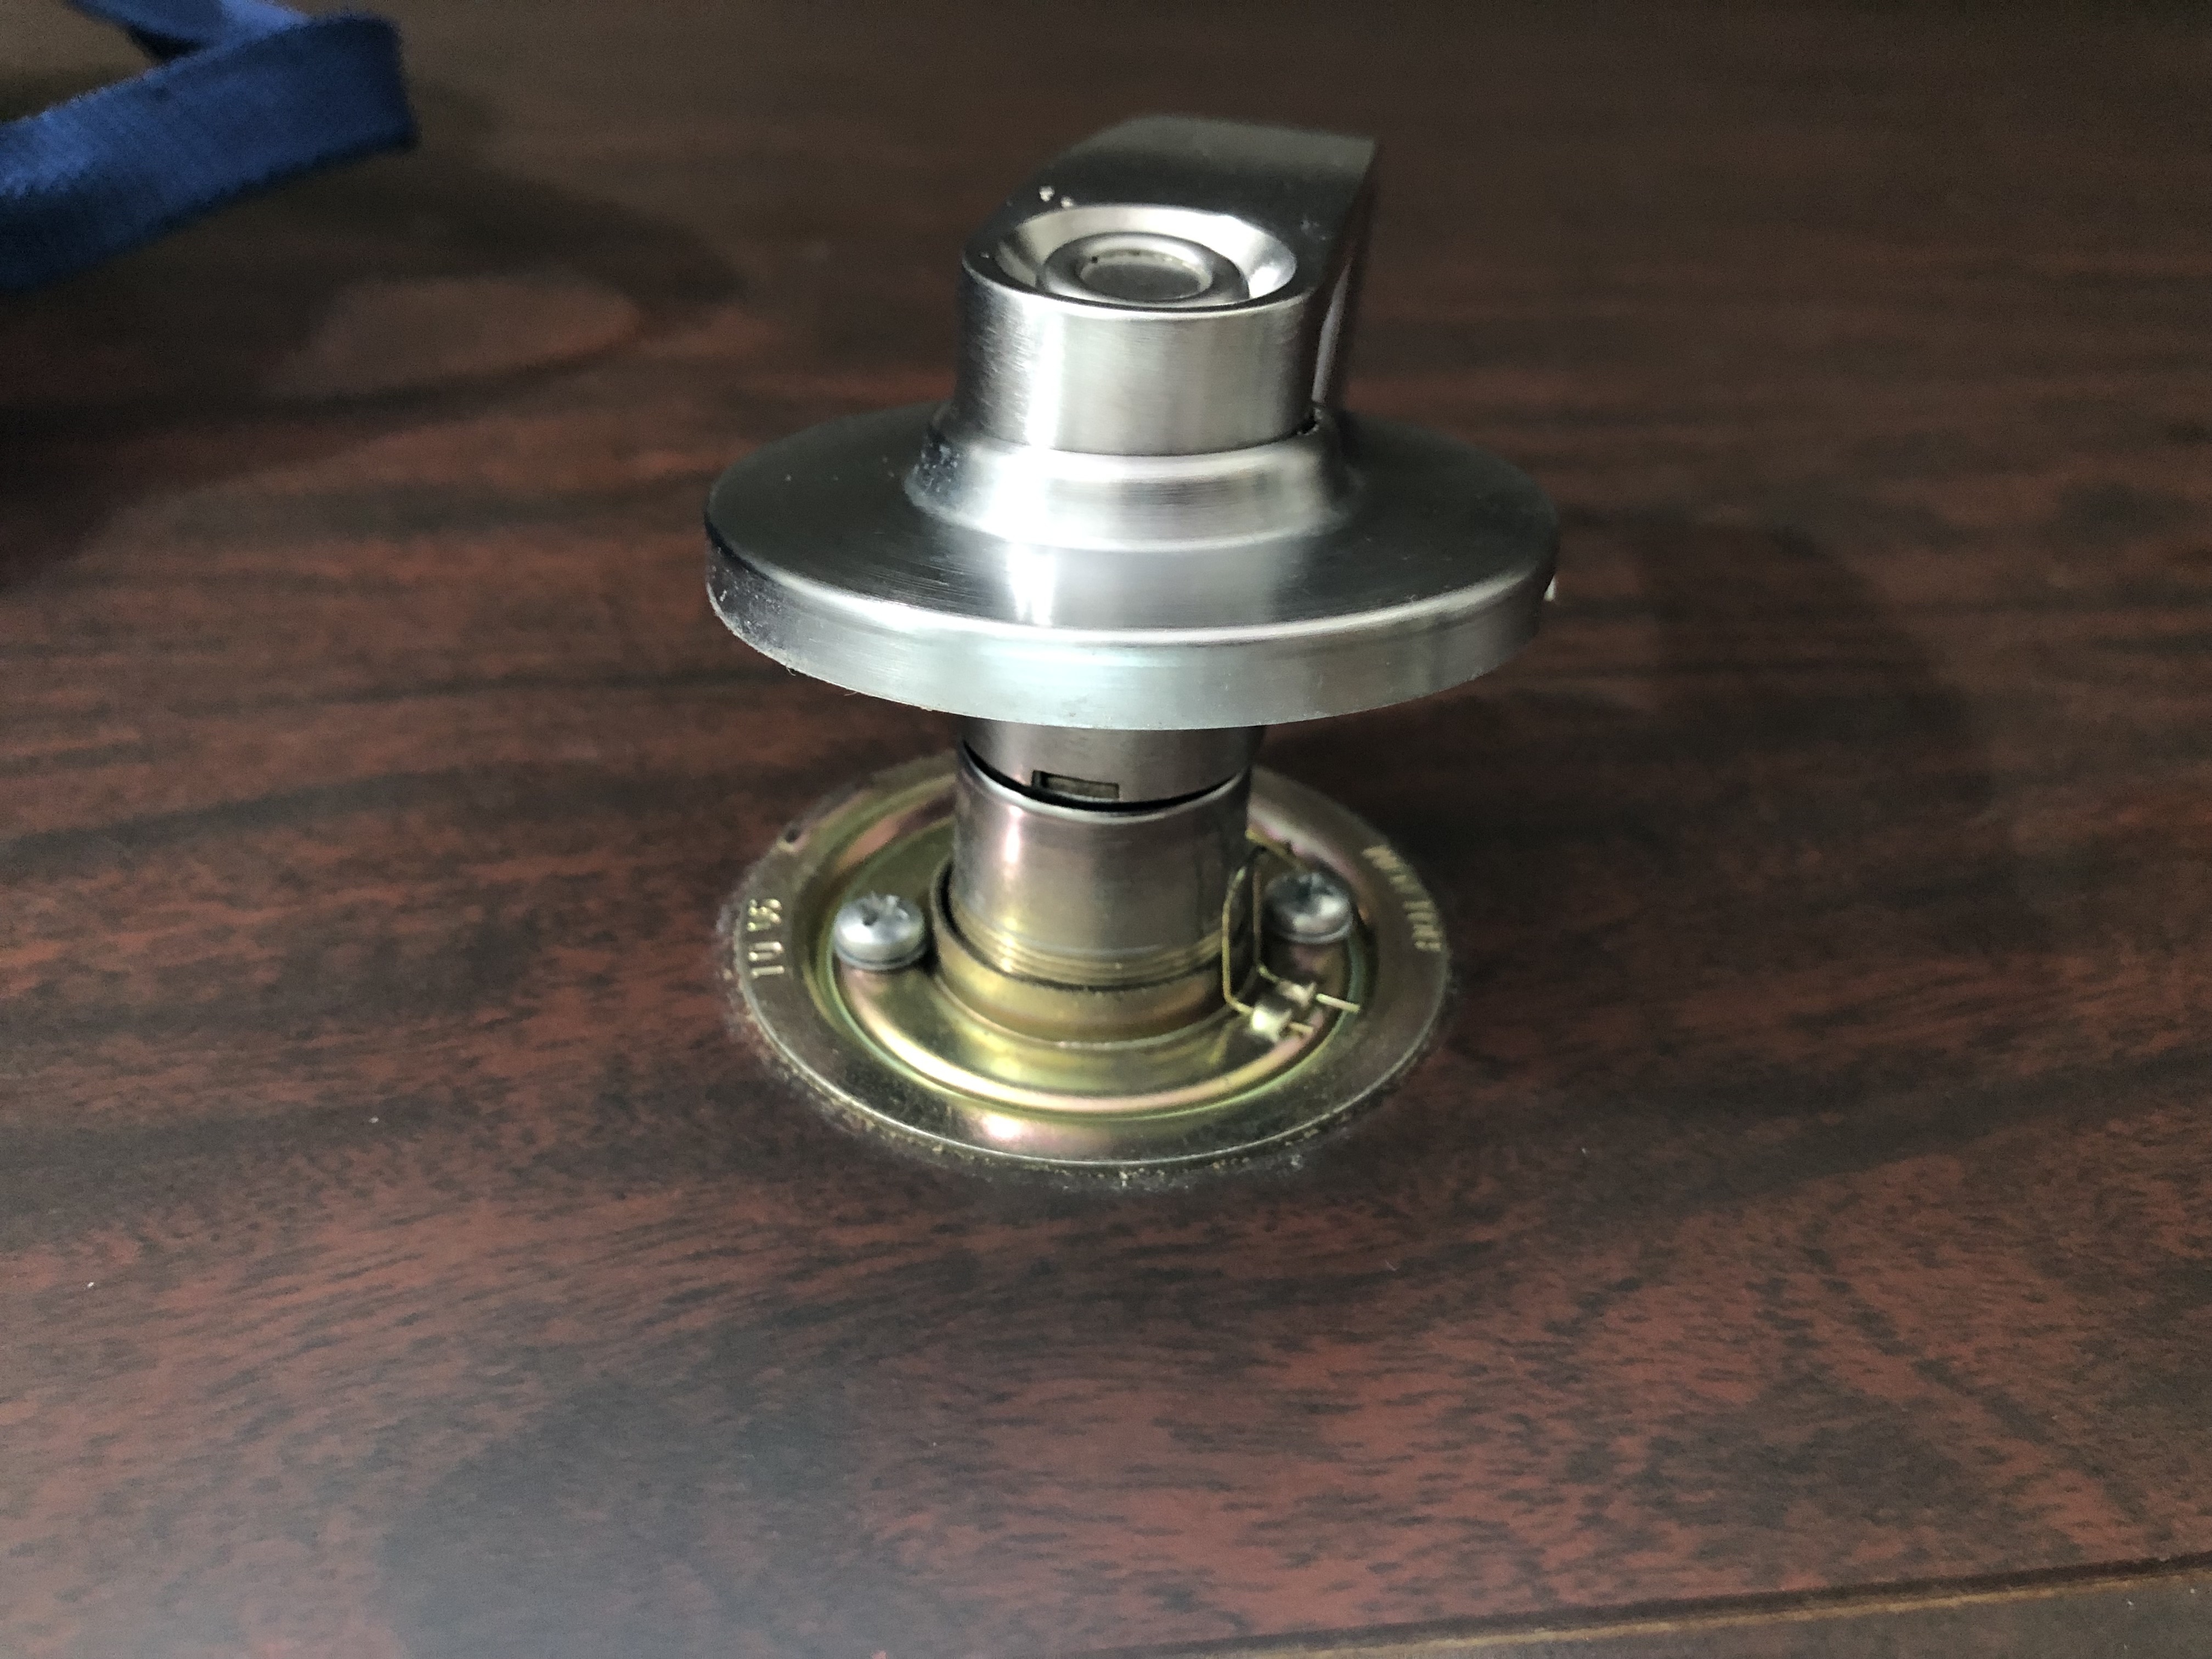
After you tighten the knob, be sure to check the operation. Does the knob turn both ways and return to the neutral position and the bolt work correctly? If not, you tightened it too much. Loosen the screws and test again. Ah Ha! Maybe that is why it is loose because when it is tight the knob does not work. This is either an alignment problem of the knob and latch (not common) or the knob or latch is worn out and needs to be replaced (more common).
Adjusting a Door Latch/bolt
If you suspect it is an alignment problem of the latch to the door knob, remove both halves of the knob off the door. Reinsert the half with the long pin into the door latch in the hole and observe if the long pin and latch hole are aligning and engaging accurately. The door knob should insert easily and smoothly into the latch. Turn the knob and watch the movement of the knob components and latch assembly from the open side. Is everything appear to be lined up? If not, first look on the edge of the door and look to see if the latch plate is installed flush with the door edge. If it is recessed too far, or not recessed enough, that may be your alignment problem. If that looks good you may need to replace the latch assembly or door knob, or both.
If the latch/bolt assembly is not recessed enough on the edge of the door, remove the two screws and the latch from the edge of the door. Using a hammer and chisel, take out enough wood to make the latch flush with the edge. Take out small amounts at a time and test frequently.
If the latch is recessed too far, you need to shim out the back side of the latch. This can be completed using metal washers to the thickness needed, or more commonly, pieces of cardboard, layered to the thickness needed and installed behind both of the screw holes of the latch. Reinstall the latch flush with the edge, reinstall the screws and then the knob. Test the operation of the knob and latch by turning the knob both directions. Also check to see if the door closes properly and latches in the strike on the jamb. If adjusting the knob and/or the latch assembly does not fix the problem, chances are you need a new knob and latch assembly.
Sticky Door Knob
Ever have one of those door knobs that when you turn it one direction or the other, it will not return to the neutral position? Or the latch assembly on the edge of the door will not pop back out? This may be a sign of needed lubrication. Remove the knob assembly and the latch assembly. In a safe location, use some dry spray silicon lubricant or Teflon lubricant and spray both assemblies in the areas where the parts move. Reassemble the items and test the operation. If this does not solve the problem, chances are you need to replace one or both assemblies (knob or latch).
Door Drags on the Frame
Do you have a door that drags on the frame? Sometimes this too can be seasonal. Assuming you have a wood frame, minimal work is needed to fix this problem. If you have a metal door, or frame, or other material (not wood) do not try these fixes.
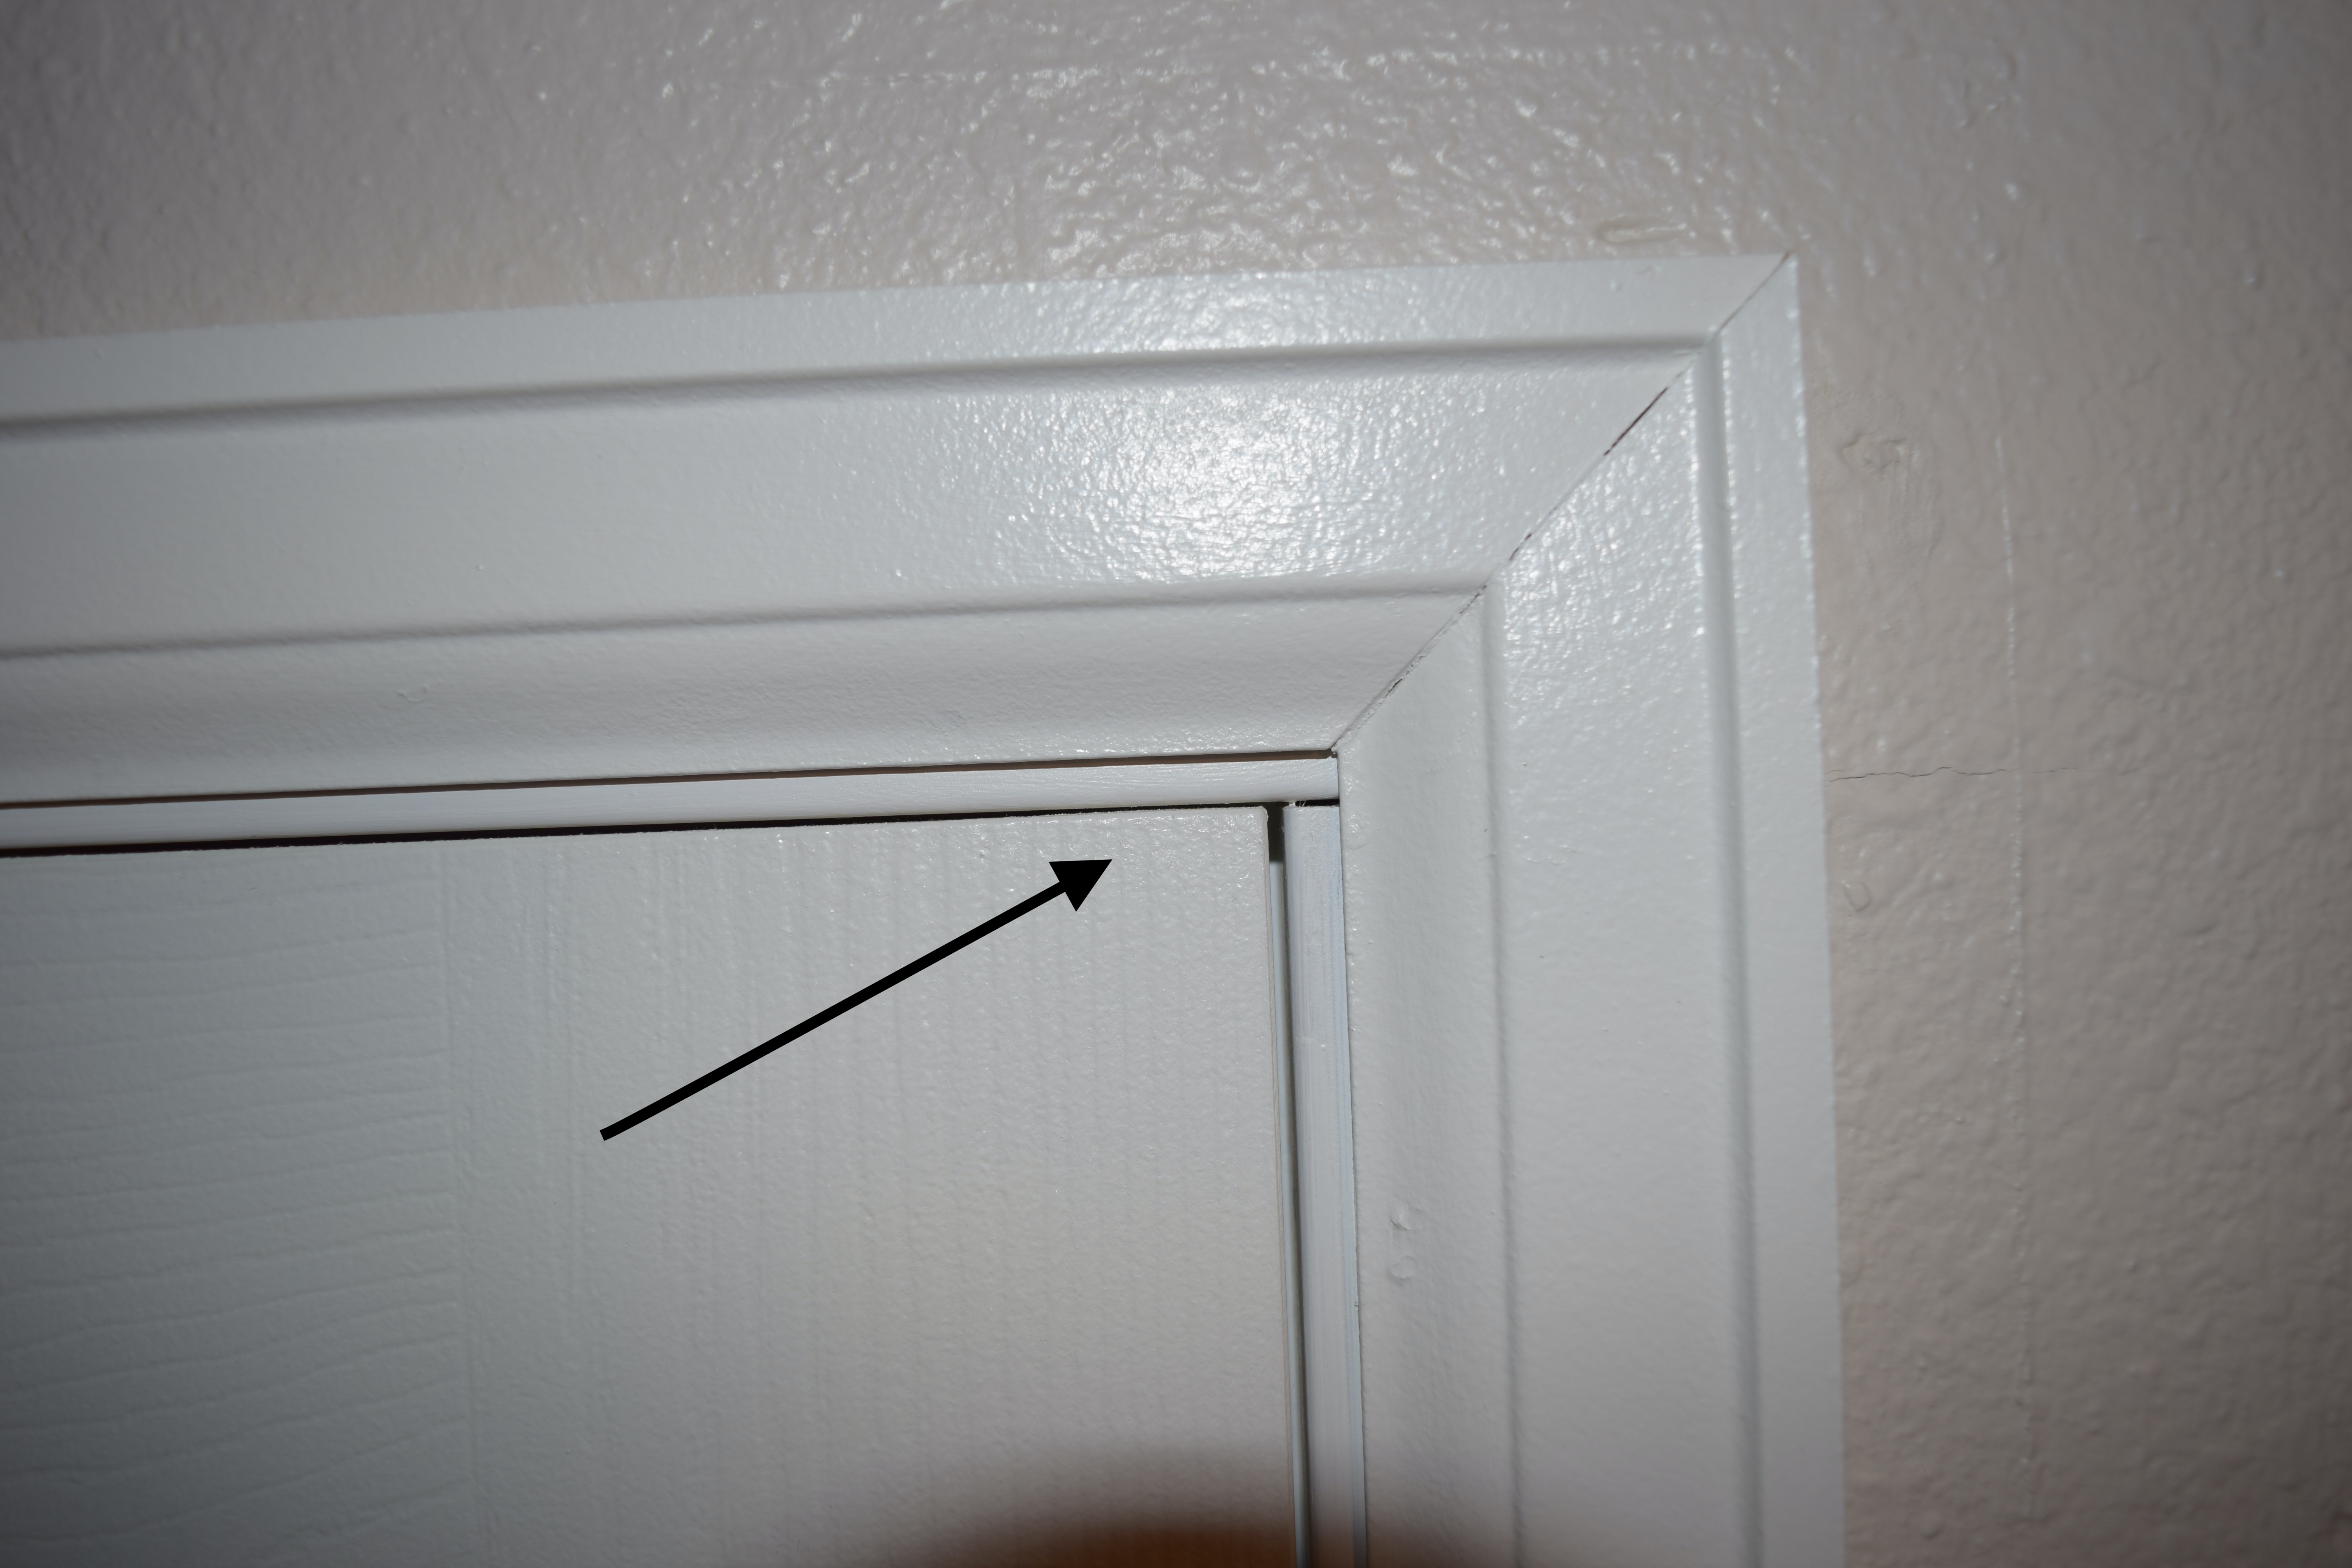
The typical problem is the door drags on the upper area of the door to the jamb. First step is to tighten the hinge screws. If the top hinge is loose, the door will sag and drag on the top corner of the jamb. If that is not the problem, keep reading.
You can install a long wood screw (3”) in the top hinge to pull the hinge side back. You can also use a long wood screw in the frame near where the door is dragging on the jamb, to pull the wood frame away from the door. Be sure to drill a pilot hole first to avoid splitting the wood of the door frame. This works on the jamb or head. Only try this if there is a small amount of drag (1/8” or less). Be aware that pulling the door back on the hinge side sometimes moves the drag point from the side to the top so multiple areas may need to be worked on. This may also change the position of the latch or deadbolt to the strike plate(s).
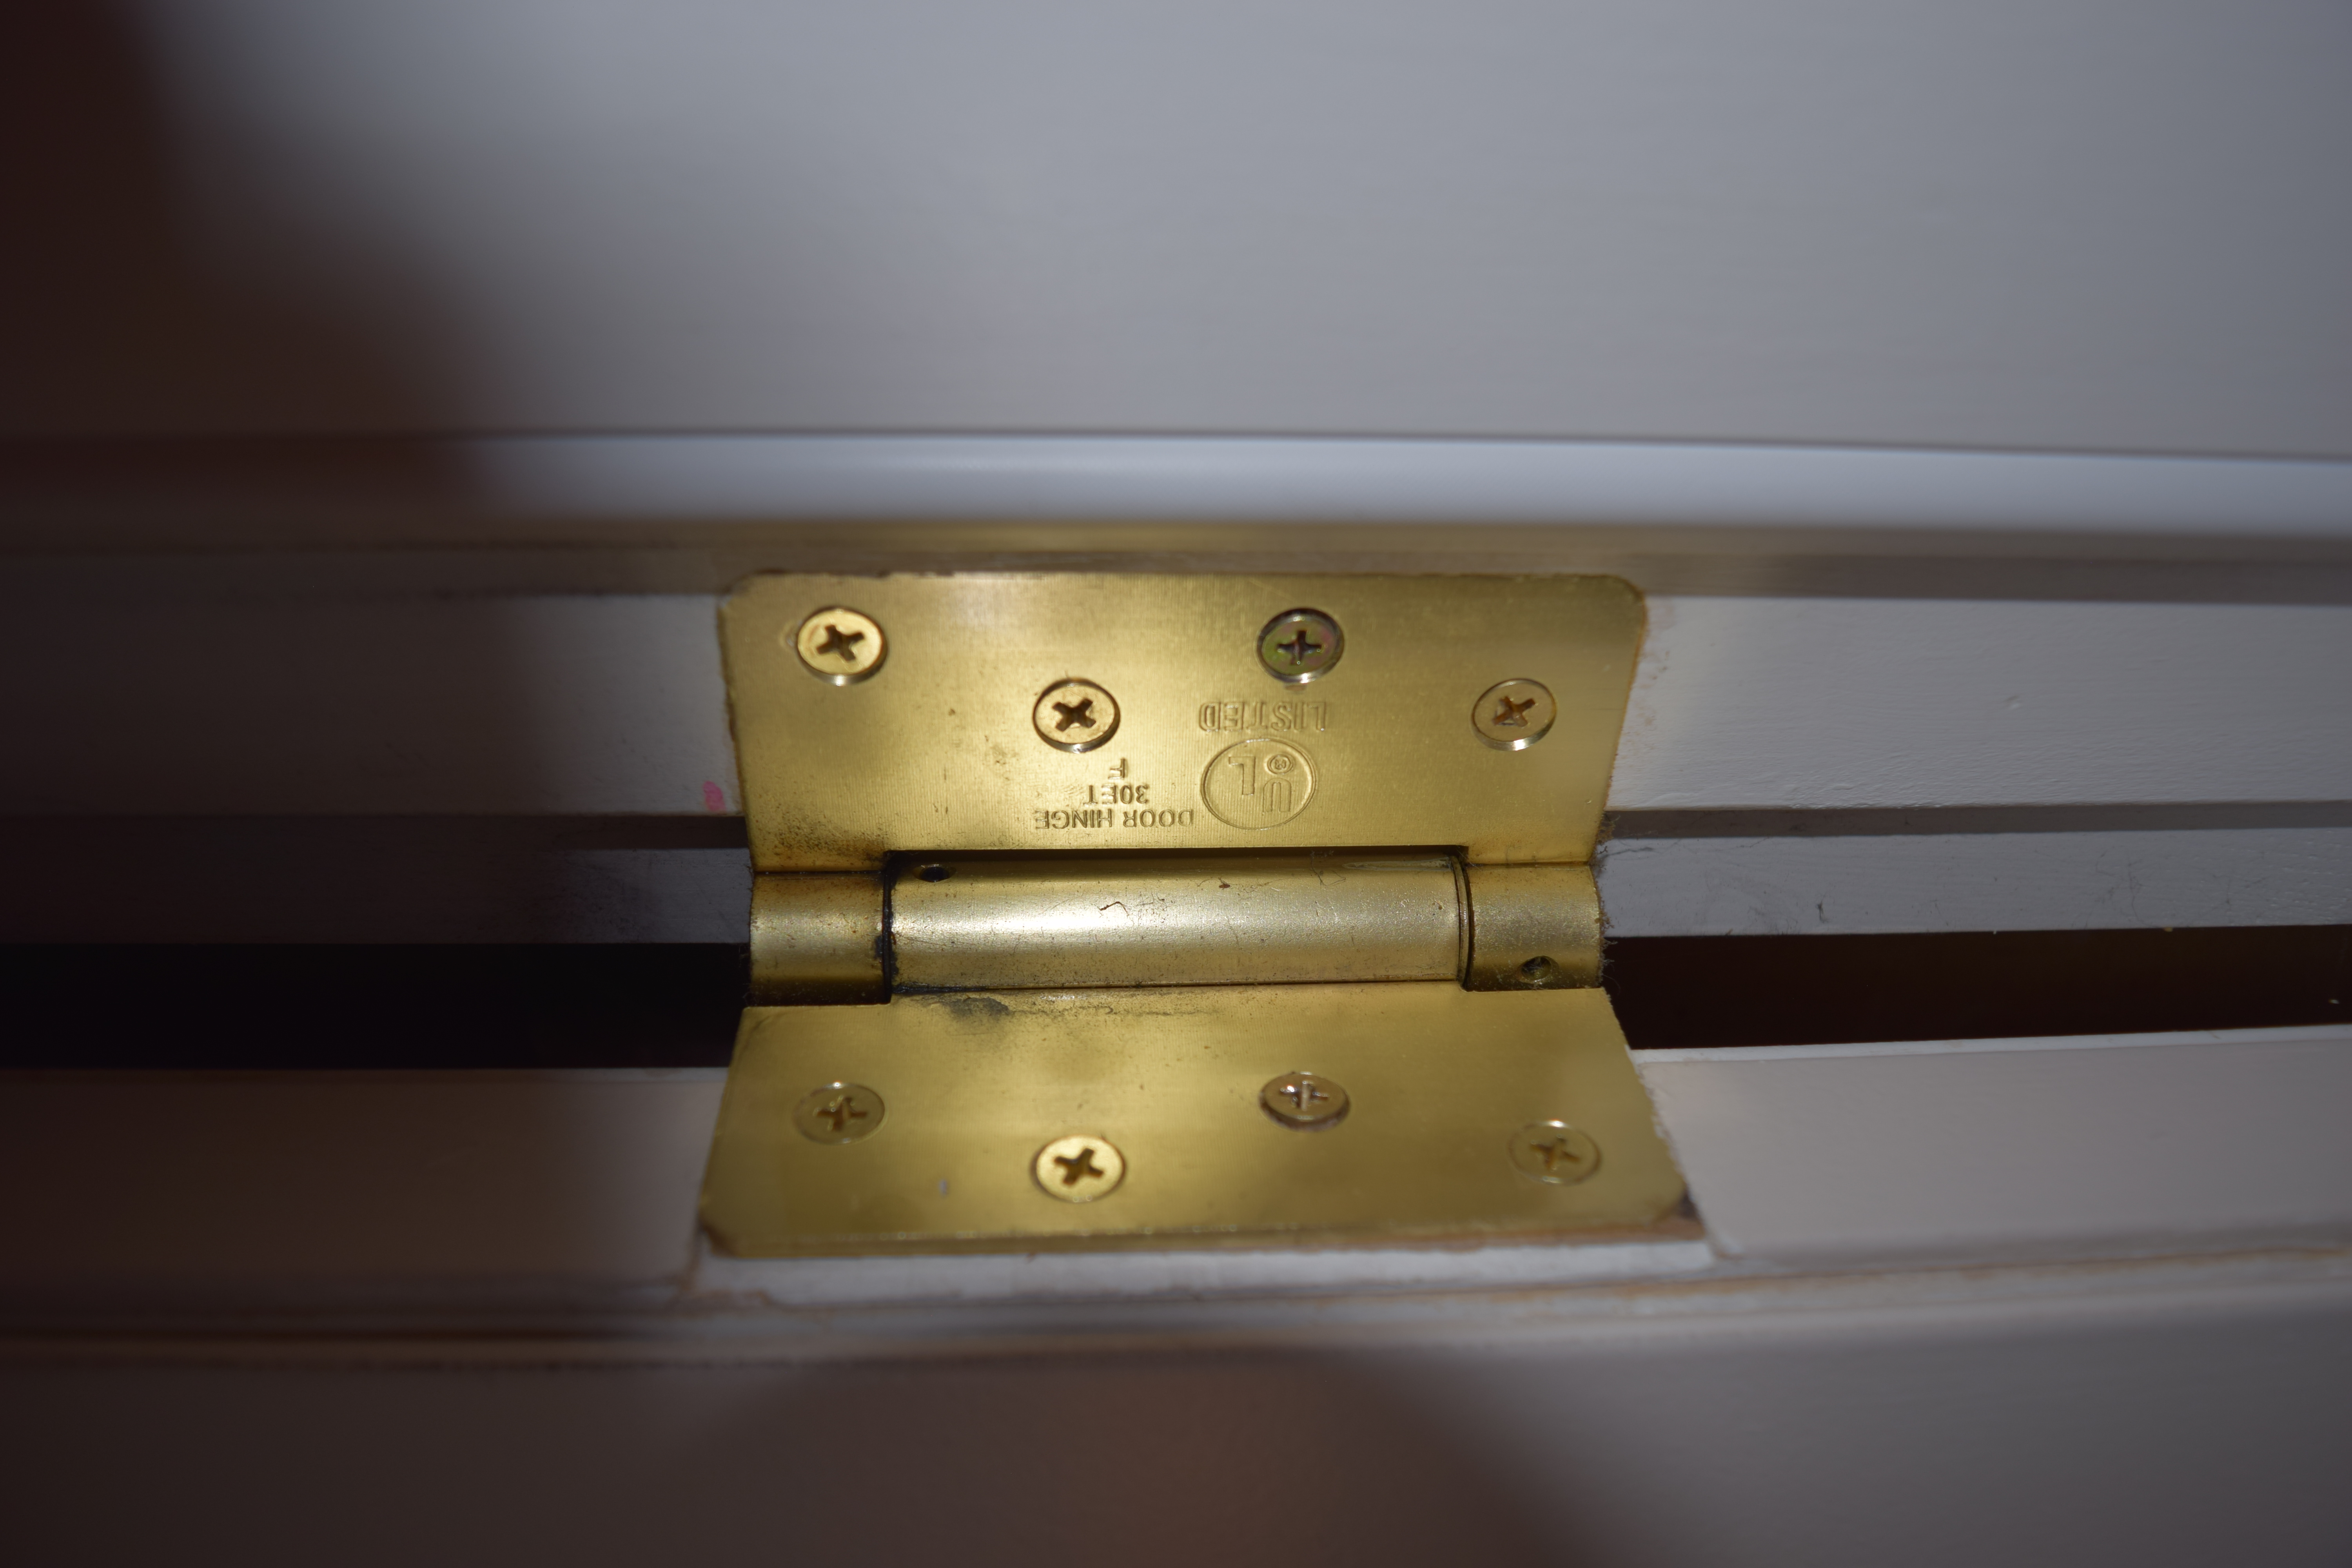
You can recess the top hinge into the frame, opposite the problem area, to pull the door away from the knob side of the jamb. Only try this if there a very small amount of drag (1/16” or less) and trying to use a large screw did not work. Remove the top hinge screws on the jamb only, leave the hinge attached to the door and fold the hinge back. With the door open, using a hammer and wood chisel, remove a very small amount of wood where the hinge was set. Reinstall the hinge and test the door. Repeat if necessary, but do not remove more than 1/16" of wood.
To remove some wood from the edge of the door where it drags, use a sander (electric or hand sander) with 120 grit sandpaper, a wood plane (electric or hand), to remove enough wood from the affected area. If you use a hand or power plane, you will need to remove the door by pulling the hinge pins and taking the door to a safe area where you can secure the door to work on. Removal of wood from the door can be a trial and error procedure. Remove small amounts at a time and test frequently as you do not want to remove too much. You will need to paint the area of the wood you removed, so be sure to allow enough removal to account for the paint.
Sliding Bypass Closet Doors
Sliding closet doors operate on rollers on a track secured to the top of the door frame. Many times problems with these types of doors are related to roller issues or damage to the roller track.
If the door(s) do not roll easily, check the track for accumulated debris. If someone has lubricated the track or rollers with an oil based lubricant, there may be dust/dirt that needs cleaned. If the doors go "bump, bump, bump" as they roll, the rollers may be damaged or there may be debris in the roller track.
First, remove the bottom door guide on the floor. This will allow the doors to swing freely. Grab the front door, pull the bottom of the door towards you, and lift the door from the track. Do the same with the rear door. This is assuming the track channels are installed away from you. If the channels are towards you, you will need to start with the rear door, push it away from you and lift. If either of these techniques do not work, unscrew the rollers to remove the doors.

After you have removed the doors, inspect the rollers for damage. Inspect the roller channels in the track. The track should be smooth. If the lip of channel is damaged or bent, the track may need to be replaced. Use a dry rag and wipe out each channel.
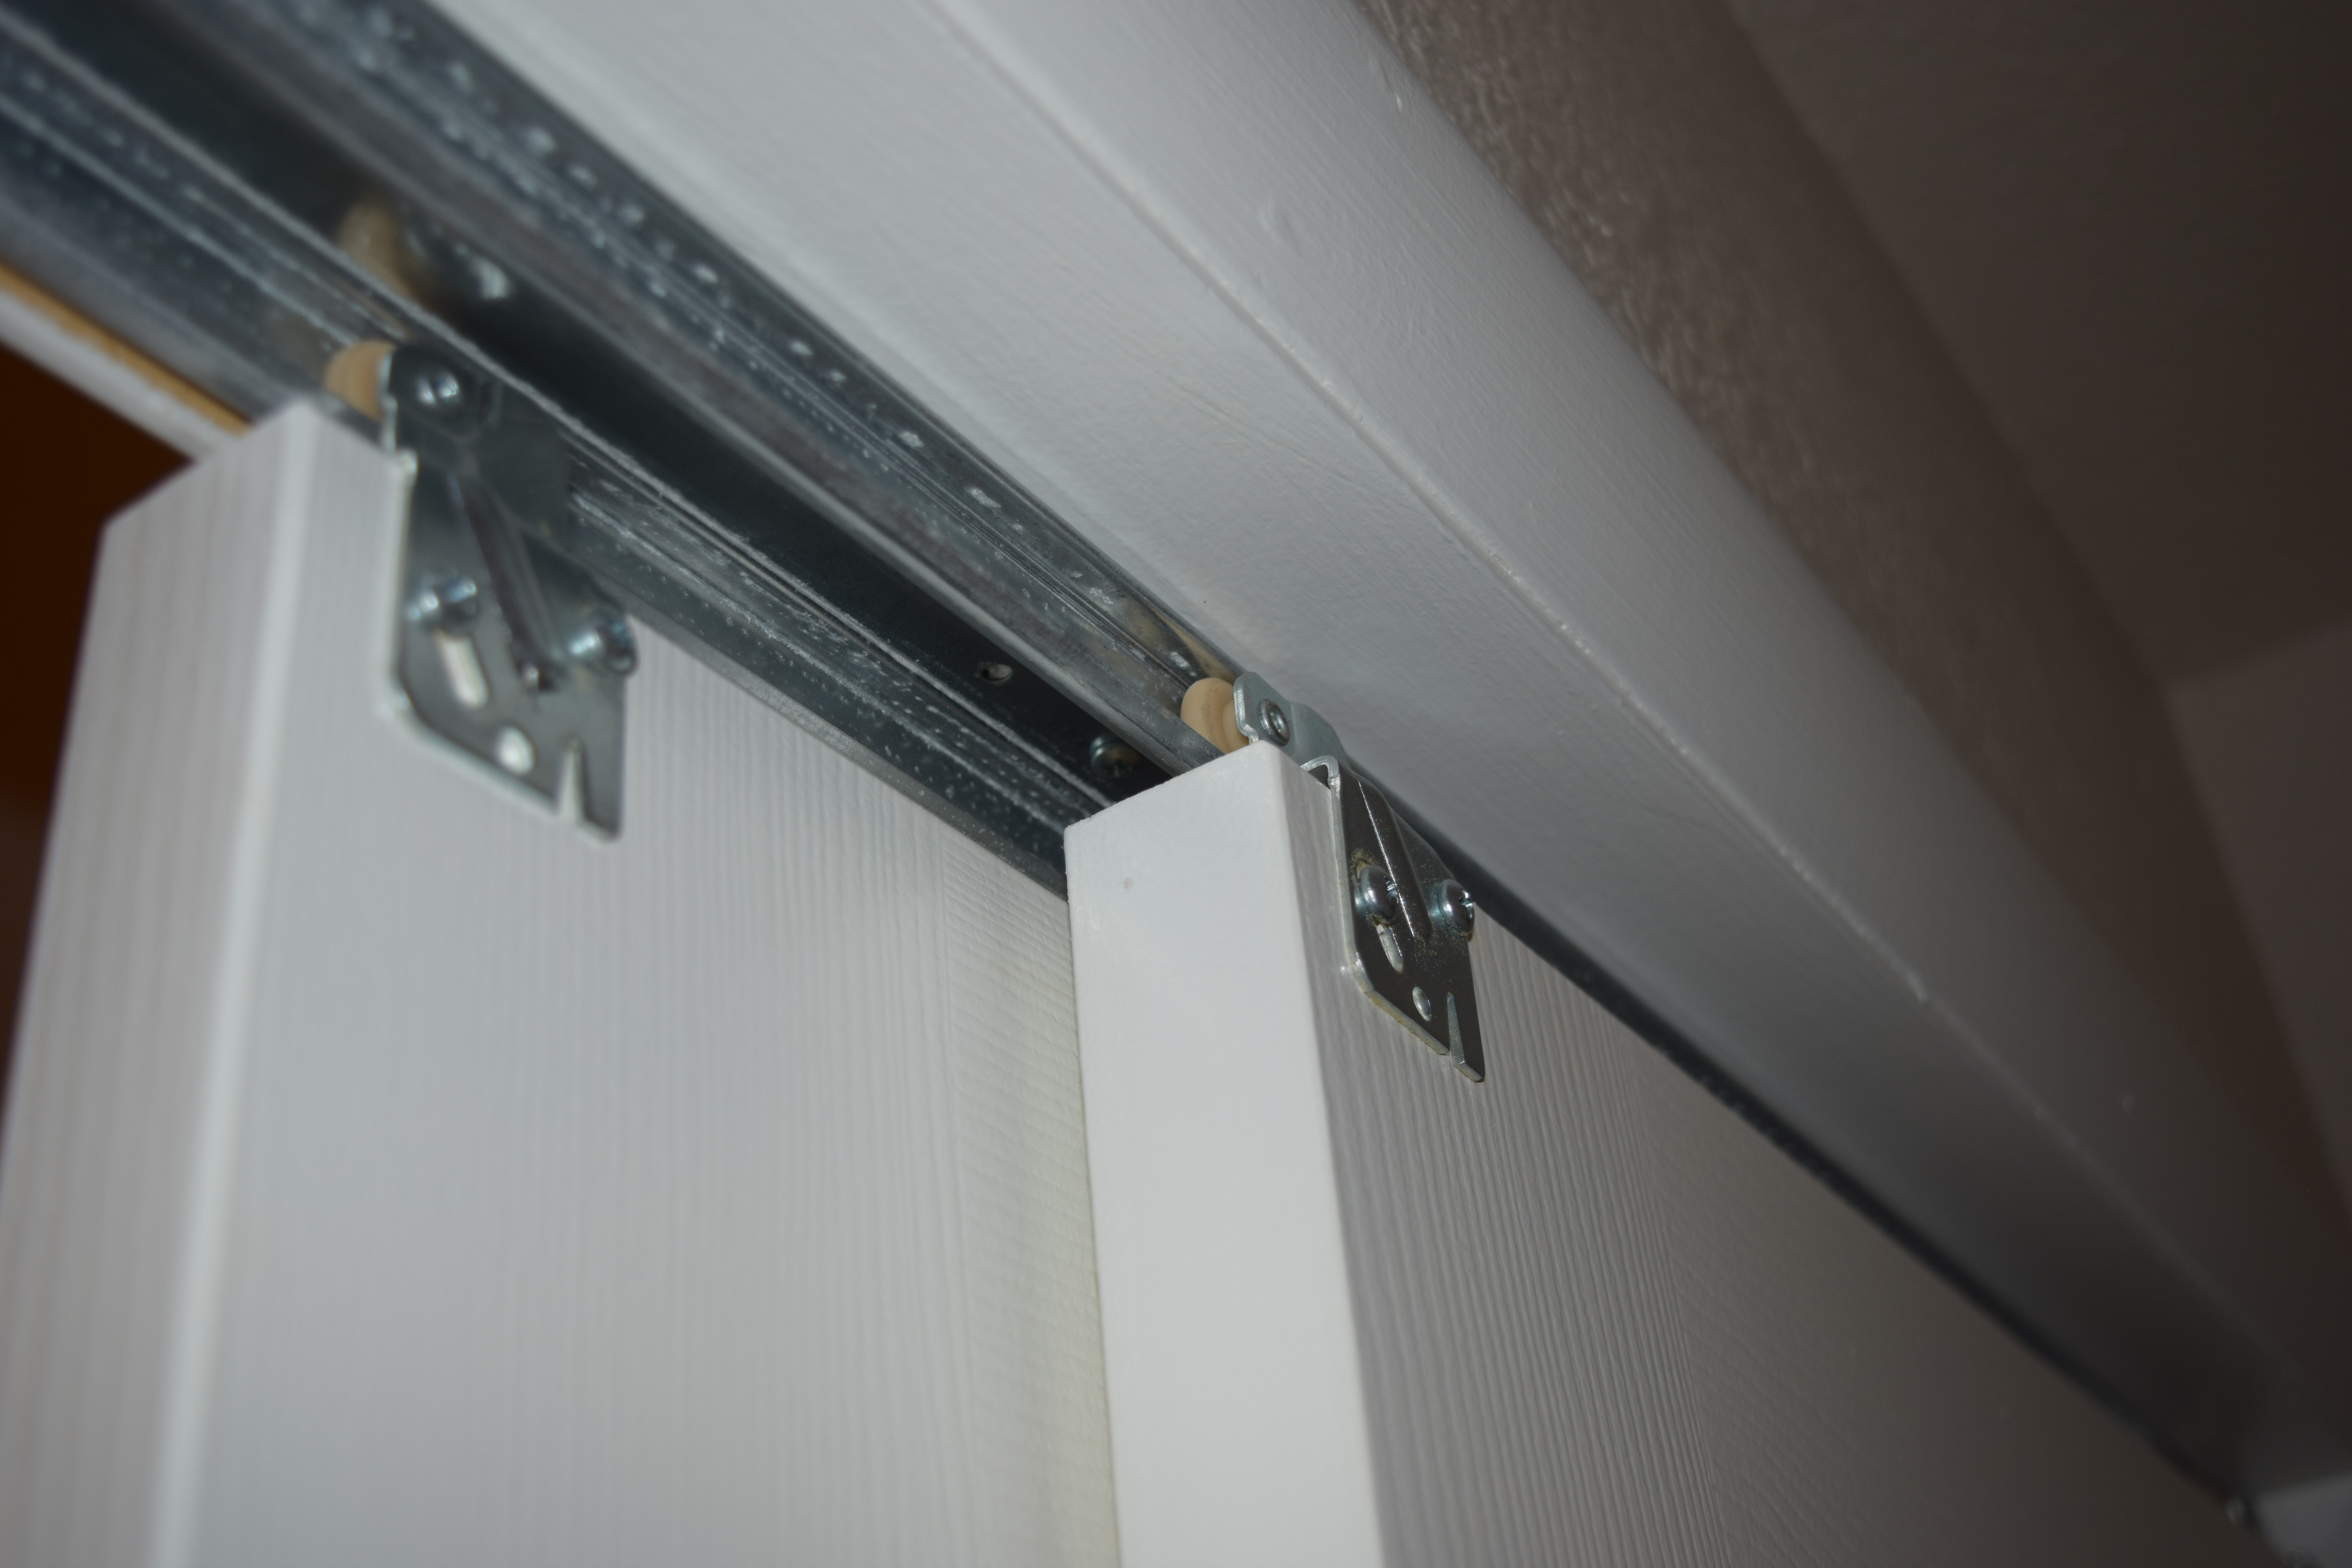
Before reinstalling the doors, apply some dry silicon lubricant or Teflon lubricant to the rollers and the track. Be sure to protect the area from over spray or dripping of the lubricant. Reinstall the doors in the reverse order you removed them and check the operation.
Once they are operating to your satisfaction, check the alignment of the sides of the doors at the jamb with each door closed. The door should strike the jamb evenly at the top and bottom. If there is a gap, the rollers on the door need adjusted. Most rollers have an adjustment screw to raise or lower the door. If your roller assembly does not have this adjustment, the entire roller assembly will need to be repositioned.
Bi-fold doors have a similar operation and the maintenance of the track and rollers is similar to the above.
French Doors
If you have French Doors, mostly likely you have issues, or will have issues with their operation. They may drag on the head jamb, or the most common problem is they rub in the middle where they come together. These issues can be seasonal. As temperature and humidity changes, the doors move. See the section above, Door Drags on the Frame to resolve your issue.
Door Threshold
Do you feel air coming in the bottom of the door or can you see daylight between the door and threshold? Entry door thresholds may occasionally need adjustment or the door sweep replaced.
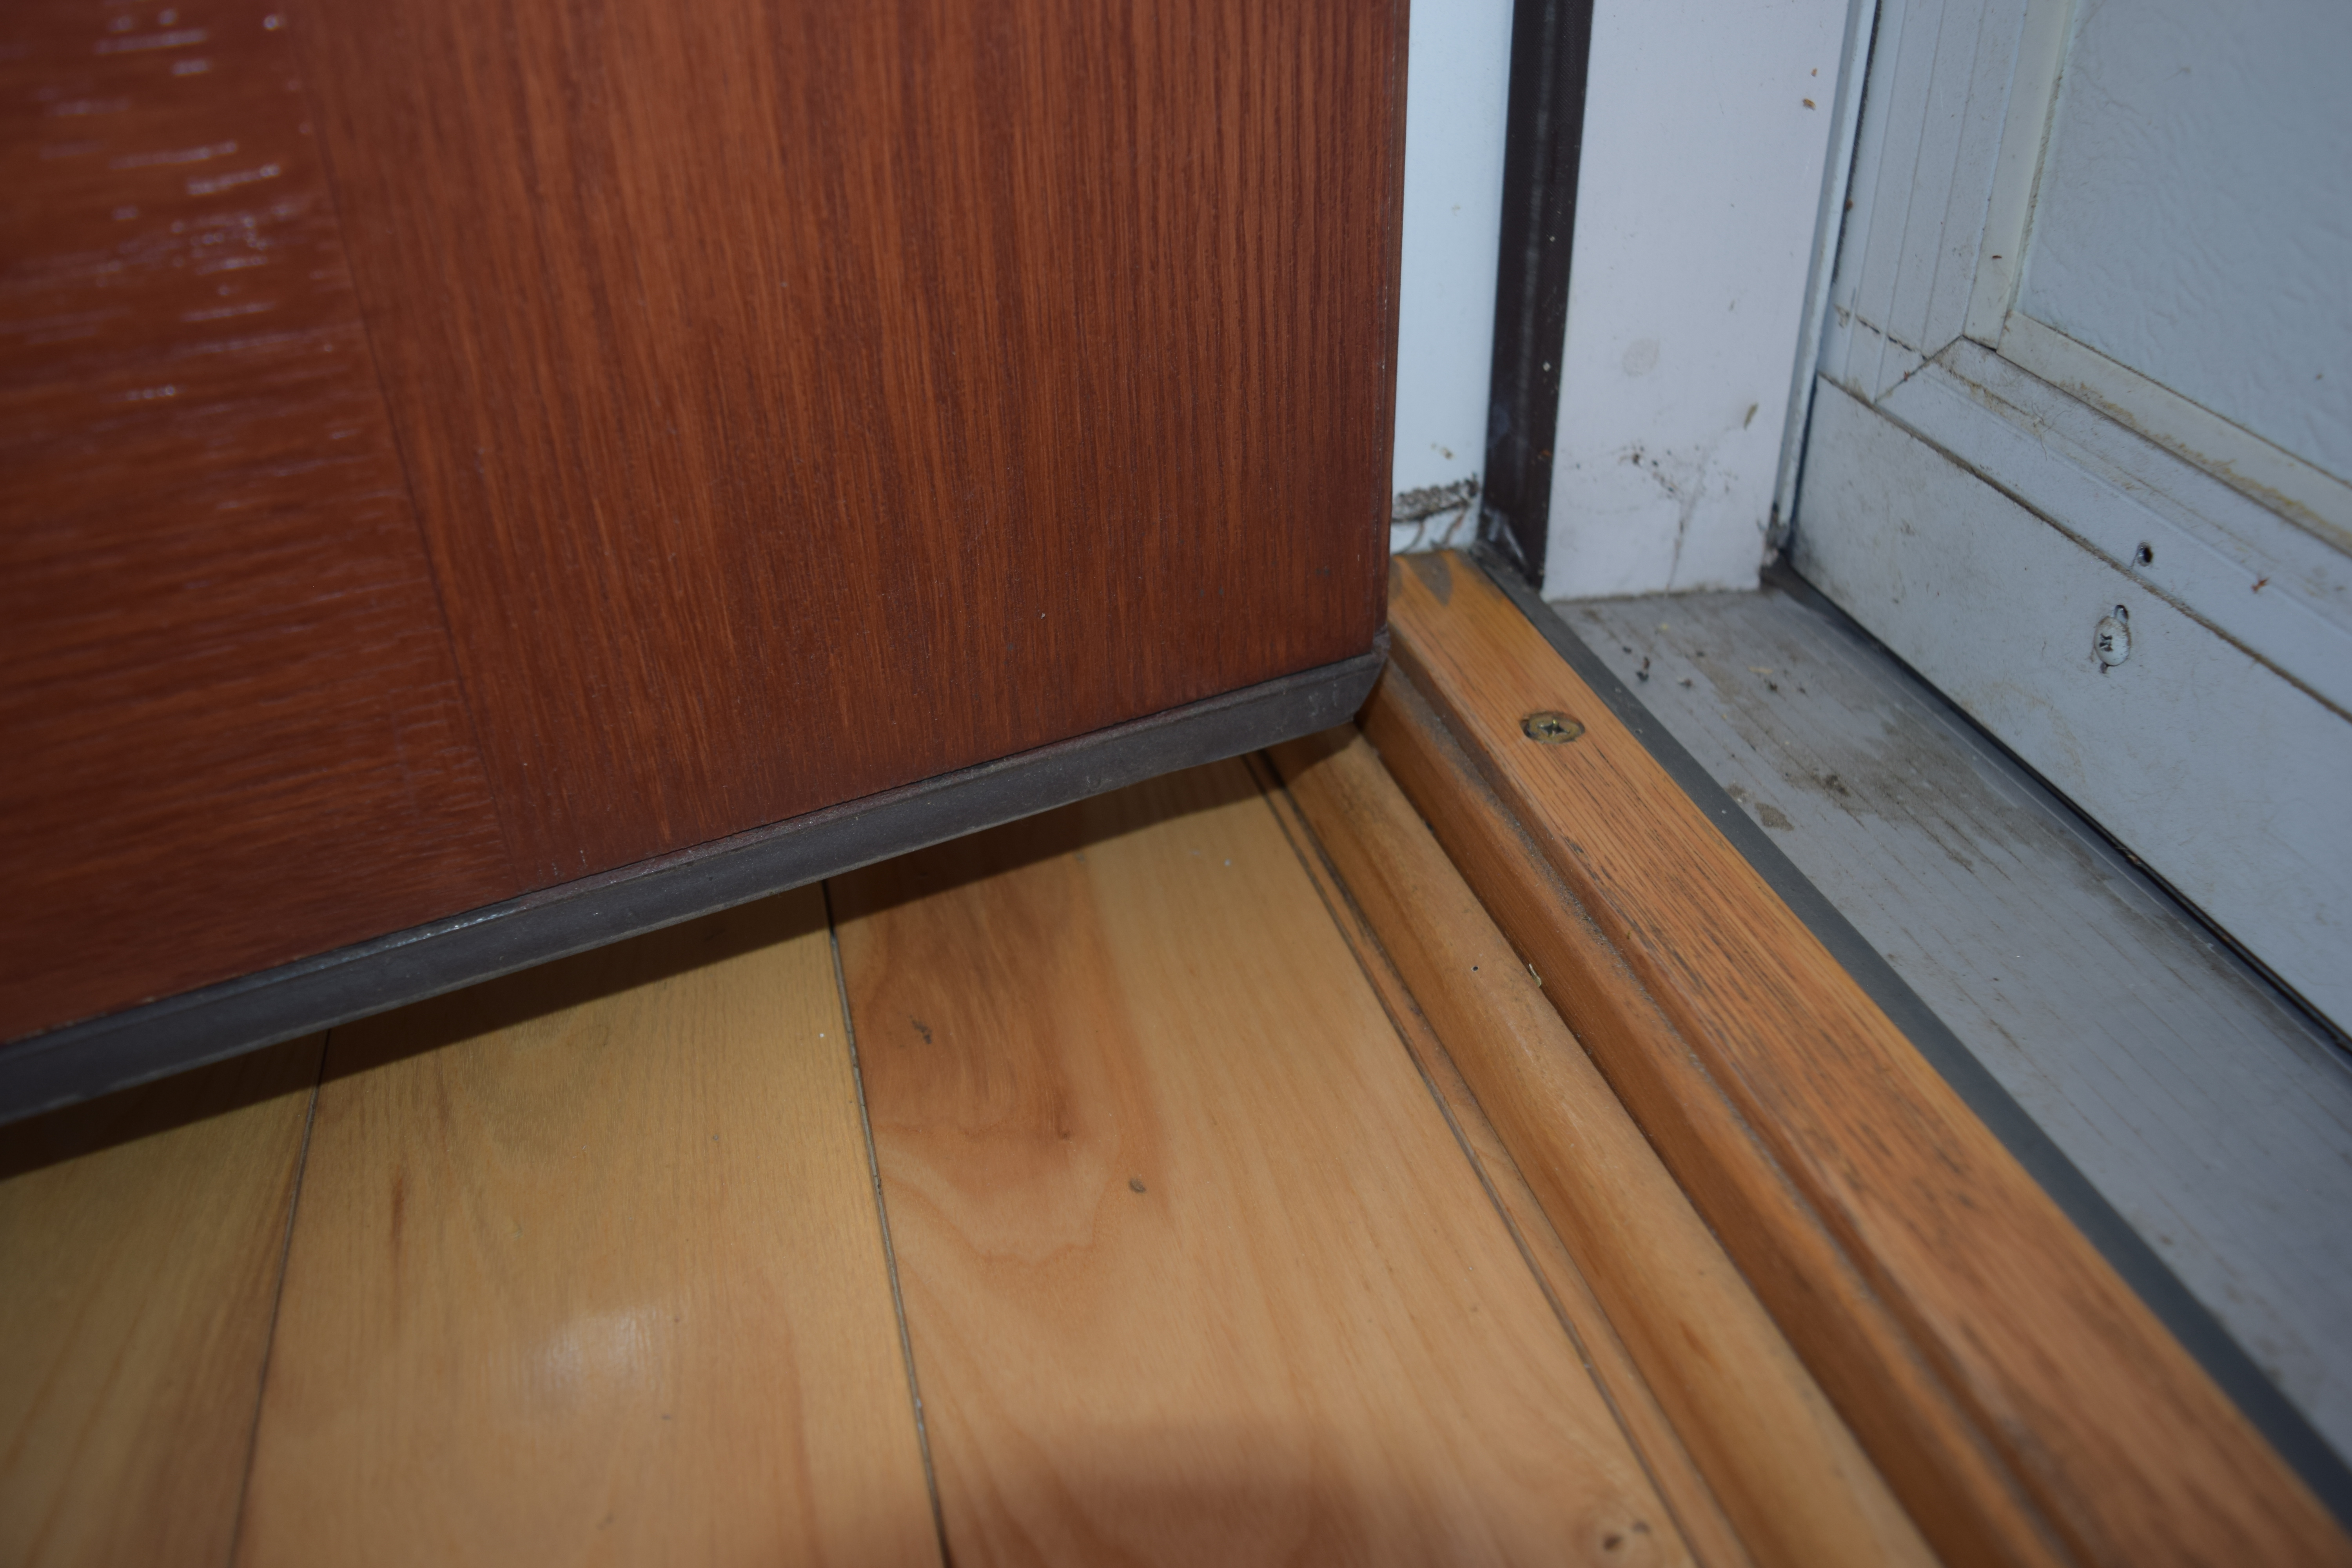
Over years of use, the rubber sweep on the bottom of the door wears out and needs replaced. On newer doors, the sweep snaps in the bottom of the door. Older doors it may be screwed on. To replace the sweep, pull the hinge pins and remove the door. After removal, protect the door from damage with rags or an old blanket. Lay it flat on saw horse or have someone assist and set it on the hinge edge side. Looking at the sweep, insert a flat screwdriver or putty knife and gently try to pry the threshold away from the bottom of the door. Once removed, take it to a local home center to match up a replacement sweep.
After you replace the sweep, the threshold may need adjusted. Try closing the door. If it drags too hard the threshold needs to be lowered. If it closes easily, look at the bottom of the door to see if you can see daylight. If you can, the threshold needs to be raised. Newer thresholds have adjustment screws in the thresholds you turn to raise and lower it. Turn the screws and check the door. Repeat as needed until the daylight disappears and the door closes easily.
Annual Door Maintenance
Here are some basic tips for door maintenance that will preserve the life of your door and operation and help prevent some of the problems listed above.
- Annually, tighten all screws on all doors, hinges, knobs, latches, deadbolts, and strike plates.
- Lubricate the hinges, latches, deadbolts, rollers, and tracks with a dry spray silicon or Teflon lubricant. DO NOT use an oil based product like WD40, as the oil collects dust and dirt quickly. Exterior knobs and locks may need more frequent lubrication if you live in a rural or dusty area. Frequently used doors may also require more frequent maintenance.
Typical Tools Needed for Maintenance
- Phillips screwdriver
- Flat screwdriver
- Claw hammer
- Small punch or 10d or 16d nail
- Slip-joint Pliers
- Hand plane
- 120 grit sandpaper
- Silicon or Teflon lubricant
- Soft cloth and rags
- Wood chisel; 1/2" or 1"
- Drill; electric or battery operated
- Wood drill bits
- Sawhorses
Neater Nest is a participant in the Amazon Services LLC Associates Program, an affiliate advertising program designed to provide a means for sites to earn advertising fees by advertising and linking to amazon.com