Irrigation systems need to have all the water blown out before the winter freeze. This will avoid costly damage and repairs in the spring. You can use an air compressor and do the job yourself. This will save you the fee of a service call. All you need is an air compressor, an air hose, and a quick-connect coupling to fit your system.
There are many different blowout methods to connect to your irrigation system. Most homeowners do not have a large enough home compressor powerful enough to blow out the entire system at once. Generally, 10 cubic feet per minute (CFM) of air is needed for most systems. If this is the case, we recommend you blow the system out zone by zone.
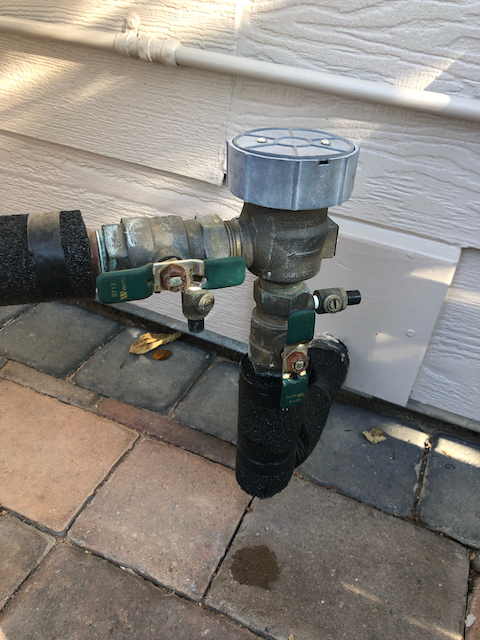
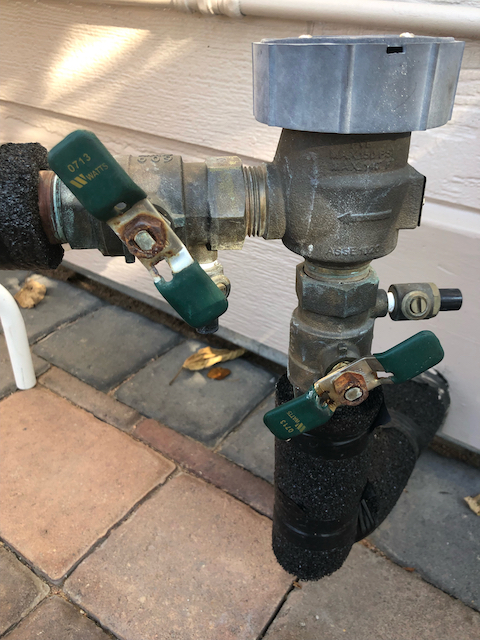
Before you start, be sure to completely shut off the main water supply to the irrigation system. Next, close off both valves on the backflow preventer. When the valve handle is in line with the pipe the valve is open. Turn the valve so it is crosswise with the pipe for off. Depending on the type of backflow device you have, this is important as the air compressor could damage the backflow preventer. If your connection is downstream of the backflow device, don't forget to drain the pipe ahead of the device to the house connection.
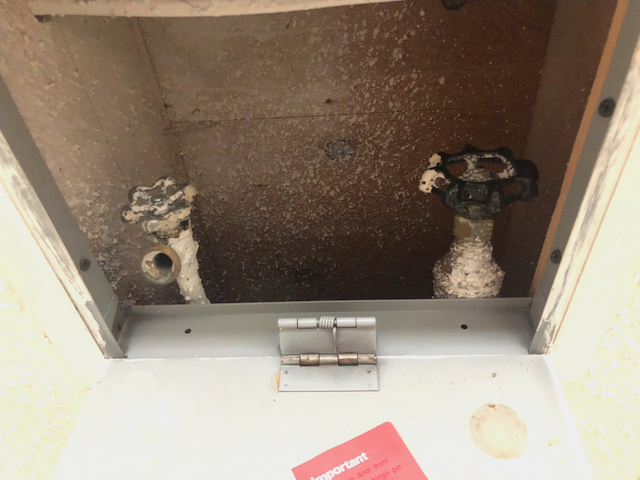
You may have a separate connection point on the system ahead of the backflow preventer, possibly inside your home. If you do, connect to that location and open the valves on the backflow preventer. See the hose bib connection shown below.
The air pressure needed is determined by the type of irrigation pipe you have "in the ground." Set the compressor's air pressure regulator to a maximum of 80 psi for rigid PVC pipe systems, or 50 psi for flexible black polyethylene pipe, and connect the compressor's air hose to the adapter and then to the compressor. 80 psi is the maximum as that is the typical maximum water pressure you should have on your domestic water system.
Activate each irrigation zone, watching the pressure on the compressor's regulator. The zone's sprinkler heads should pop up and spit out water. Stop the zone as soon as the pressure gets low or the heads run dry. Without water cooling the irrigation heads, the plastic gears on the heads could melt so don't overdo it. Progress through the zones and when you are finished with all the zones, go back and blow out each zone a second time, verifying no water is coming out. There may be a slight mist and that is ok. Usually, three times, or until there is no more water coming out of the heads will be sufficient.
When you are finished blowing out your system, turn the backflow isolation valves on your backflow preventer to a 45-degree angle to the pipe. Do this on the small test cock valves and also on the backflow preventer. Last, shut off or unplug your system controller.
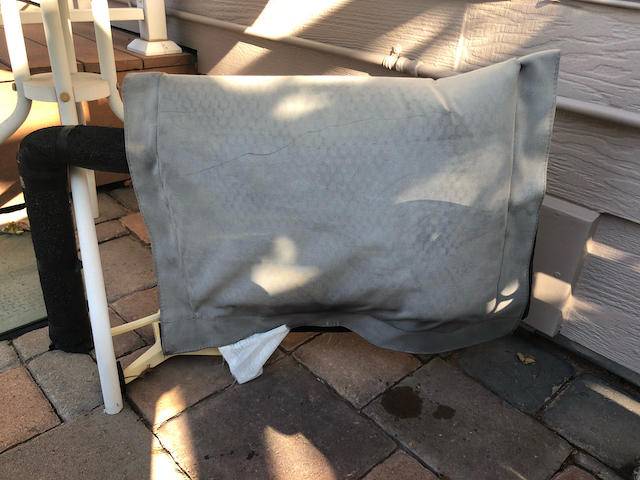
Wrap some type of insulation around the backflow preventer with an insulation cover. See the link from Amazon. This will protect it from snow and ice.
Disconnect the air hose, remove any adapters, reinstalled plugs, and store your tools for next season!
As with any DIY project, if you do not feel comfortable doing this yourself, contact an irrigation professional or Neaternest.com.
Congratulations! You are done and saved yourself some money!